> ## Documentation Index
> Fetch the complete documentation index at: https://docs.topsort.com/llms.txt
> Use this file to discover all available pages before exploring further.
# Enhanced roles and permissions
> Introduced granular Role-Based Access Control (RBAC), allowing Key Account Managers to manage vendor-specific campaigns and data with tailored permissions, improving security and workflow efficiency.
export const ChangelogActions = () => {
return <>
;
};
November 21, 2024Ad PlatformImprovement
### **Enhanced roles and permissions**
RBAC (Role-Based Access Control) - Additional Roles and Permissions enhances account security and flexibility by allowing Key Account Managers (KAMs) to access specific account data and create campaigns restricted to certain vendors. This ensures better role management and accountability.
### **Importance of RBAC - Additional Roles and Permissions**
Provides granular control over who can access and manage vendor-specific data and campaigns.
### **Key Benefits**
* **Focused Campaigns**: Lets KAMs work directly with vendors they’re assigned to, ensuring everything stays organized and efficient.
* **Clear Data Access**: Provides a clear view of data and information about the specified vendors, helping KAMs make informed decisions.
### **How It Works**
When assigning roles and permissions:
1. Navigate to **“Settings”** on the sidebar and go to the **“Users”** section.
2. Click on **“+ Add Member”** in the team management section.
3. Assign the **“Sales”** role from the dropdown menu.
4. Enter the user’s first name, last name, and email address.
5. Click **“Next”** to proceed to the vendor selection screen.
6. Select the vendors the user will manage by clicking the **“Add”** button next to each relevant vendor.
7. Use the search bar to quickly find specific vendors, or select all vendors as needed.
8. Confirm the setup by clicking **“Send invitation.”**
Once the user accepts the invitation, they will have access only to the selected vendors and associated data, ensuring secure and tailored permissions.
### **Considerations**
* Only admins can assign roles and vendor access.
* KAMs cannot access data or campaigns outside their assigned vendors.
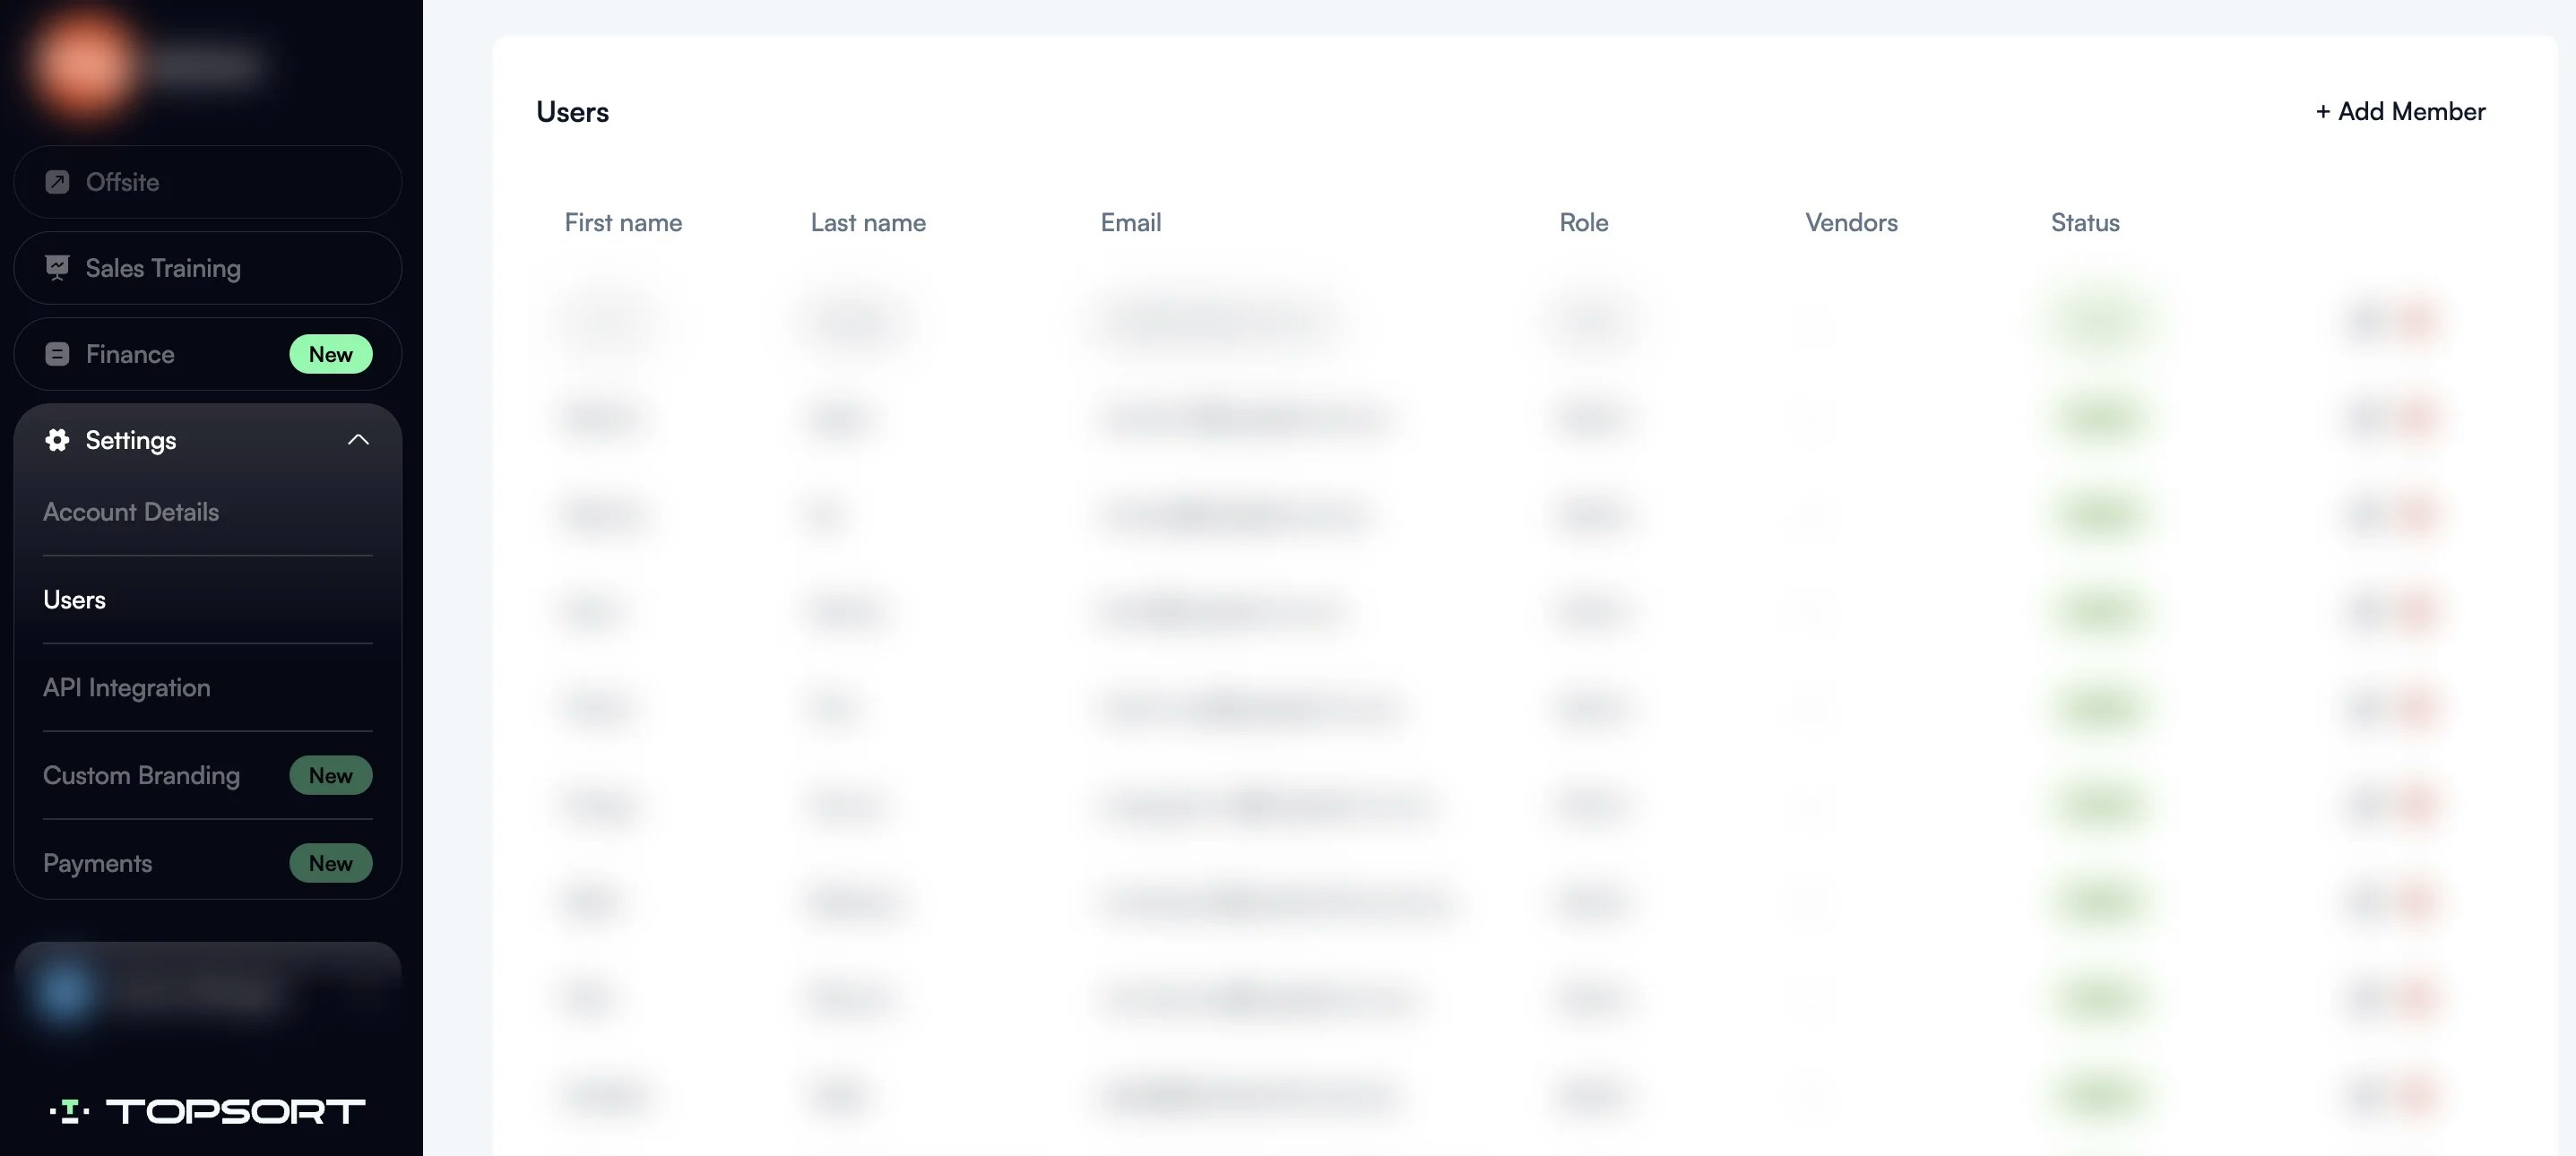 3. Assign the **“Sales”** role from the dropdown menu.
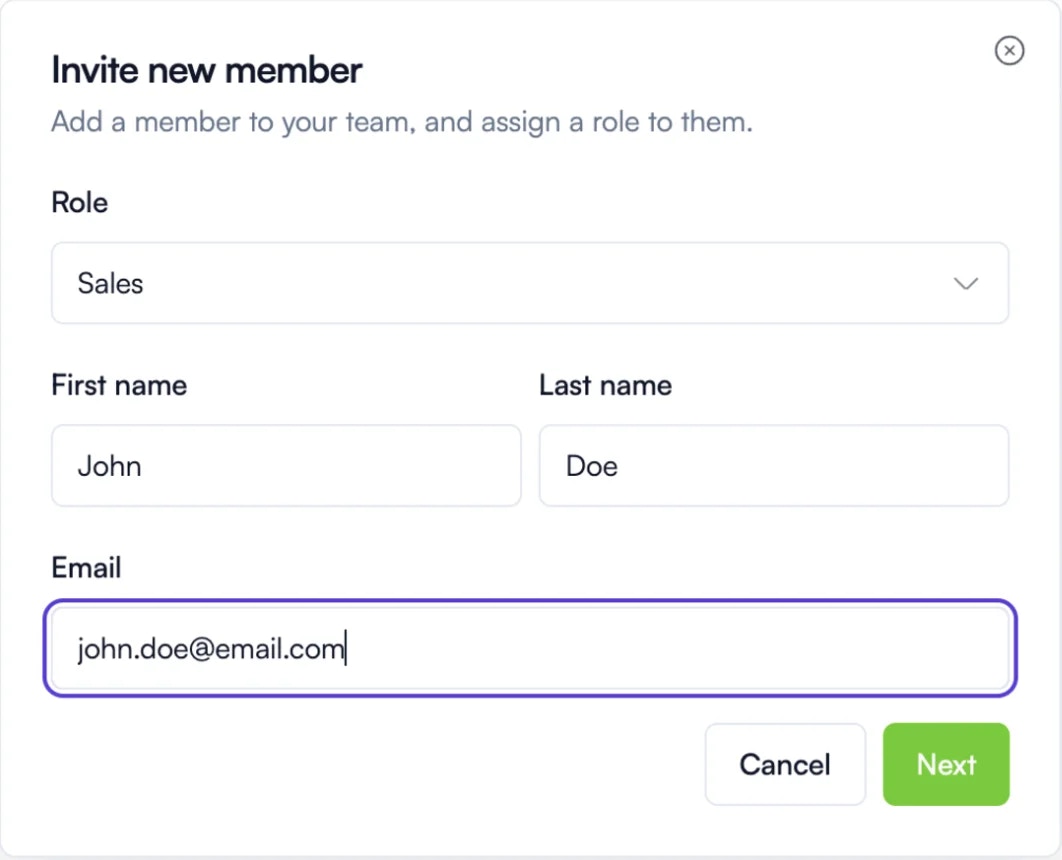 4. Enter the user’s first name, last name, and email address.
5. Click **“Next”** to proceed to the vendor selection screen.
6. Select the vendors the user will manage by clicking the **“Add”** button next to each relevant vendor.
4. Enter the user’s first name, last name, and email address.
5. Click **“Next”** to proceed to the vendor selection screen.
6. Select the vendors the user will manage by clicking the **“Add”** button next to each relevant vendor.
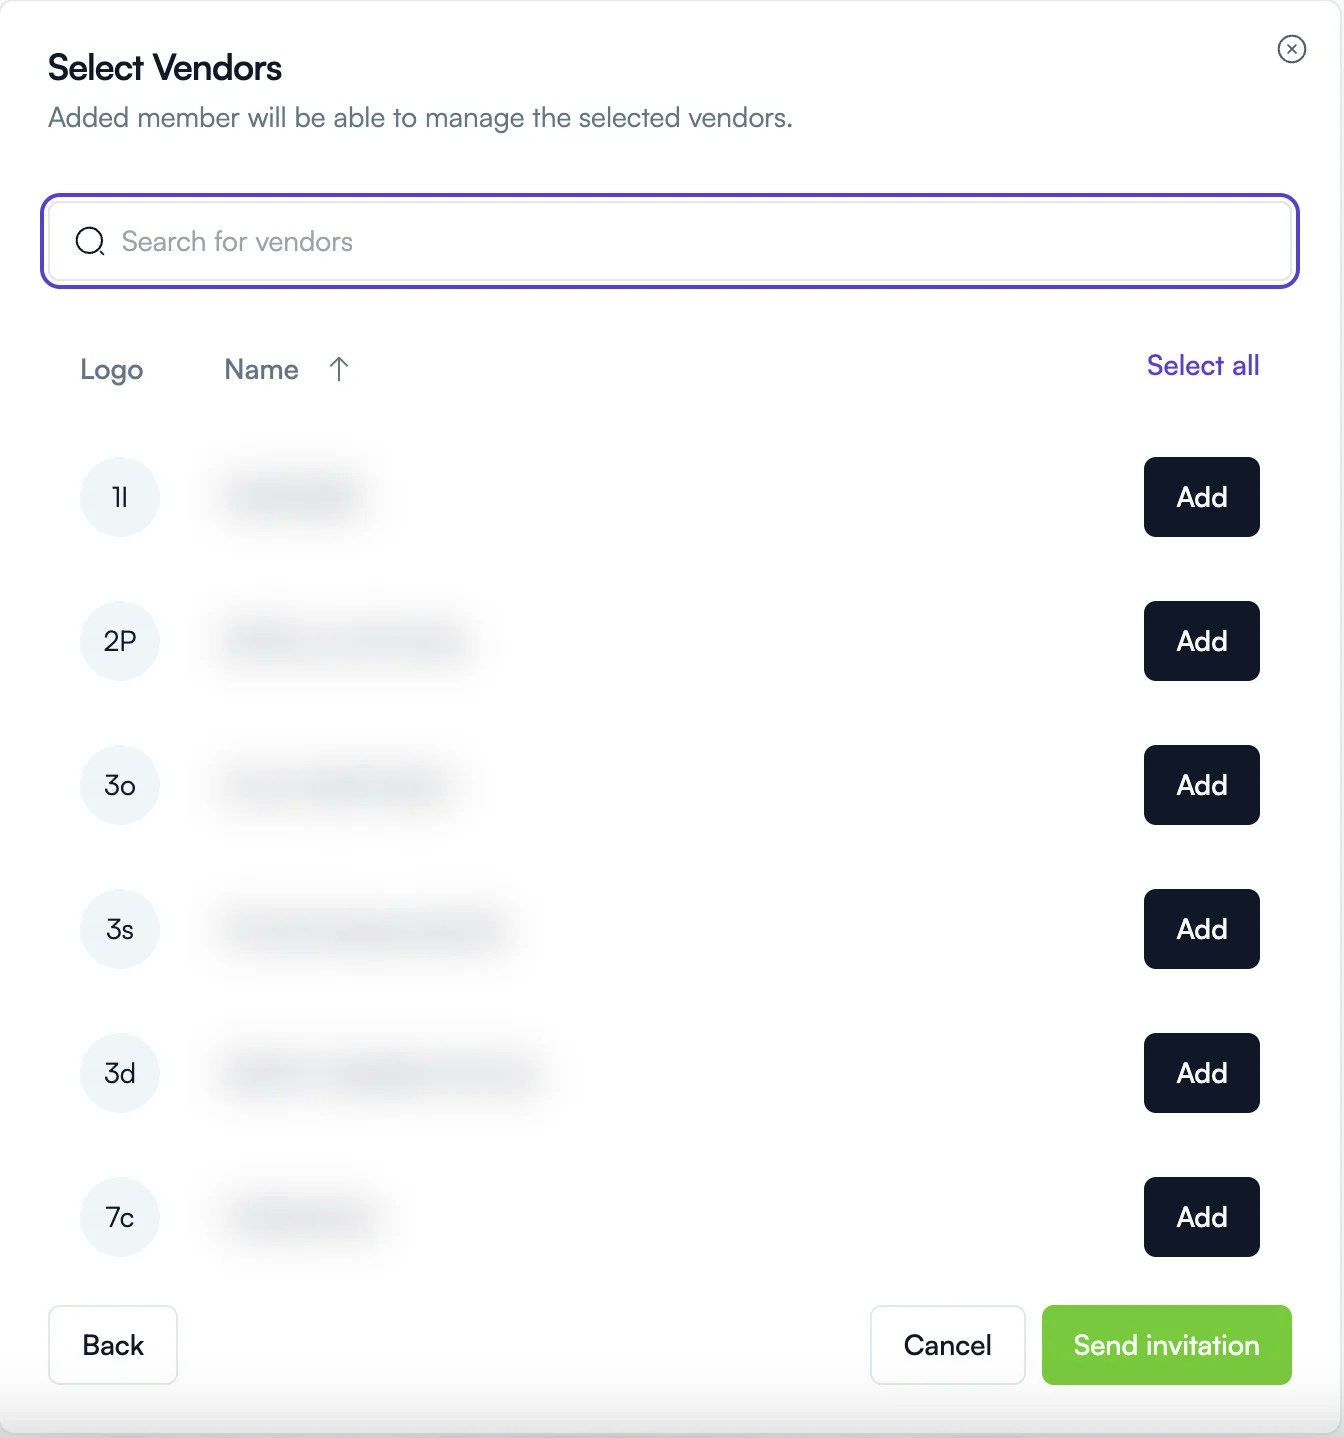 7. Use the search bar to quickly find specific vendors, or select all vendors as needed.
8. Confirm the setup by clicking **“Send invitation.”**
Once the user accepts the invitation, they will have access only to the selected vendors and associated data, ensuring secure and tailored permissions.
### **Considerations**
* Only admins can assign roles and vendor access.
* KAMs cannot access data or campaigns outside their assigned vendors.
7. Use the search bar to quickly find specific vendors, or select all vendors as needed.
8. Confirm the setup by clicking **“Send invitation.”**
Once the user accepts the invitation, they will have access only to the selected vendors and associated data, ensuring secure and tailored permissions.
### **Considerations**
* Only admins can assign roles and vendor access.
* KAMs cannot access data or campaigns outside their assigned vendors.