> ## Documentation Index
> Fetch the complete documentation index at: https://docs.topsort.com/llms.txt
> Use this file to discover all available pages before exploring further.
# Create Banner Campaigns
export const LastUpdated = ({date, lang = "en"}) => {
const translations = {
en: "Last updated:",
es: "Última actualización:",
pt: "Última atualização:",
fr: "Dernière mise à jour:",
de: "Zuletzt aktualisiert:"
};
const label = translations[lang] || translations.en;
return <>
;
};
Banner ad campaigns are a powerful tool for promoting products and driving
user engagement. This guide provides a step-by-step walkthrough of creating a
new banner campaign, from setting up your creative and linking products to
launching your ad.
## Campaign drafts
You can exit the banner campaign creation flow at any point without losing your progress. Find your draft by navigating to Ad Formats > Banners > Drafts in marketplace view and Campaigns > Drafts in the self-service view.
## Product Linking for Enhanced Targeting
Banner campaigns support **product linking**, allowing you to connect up to
200 specific products to your campaign. This feature enhances your campaigns
by automatically generating precise targeting triggers from product data and
enabling detailed performance insights with accurate attribution at the
individual product level.
## How It Works
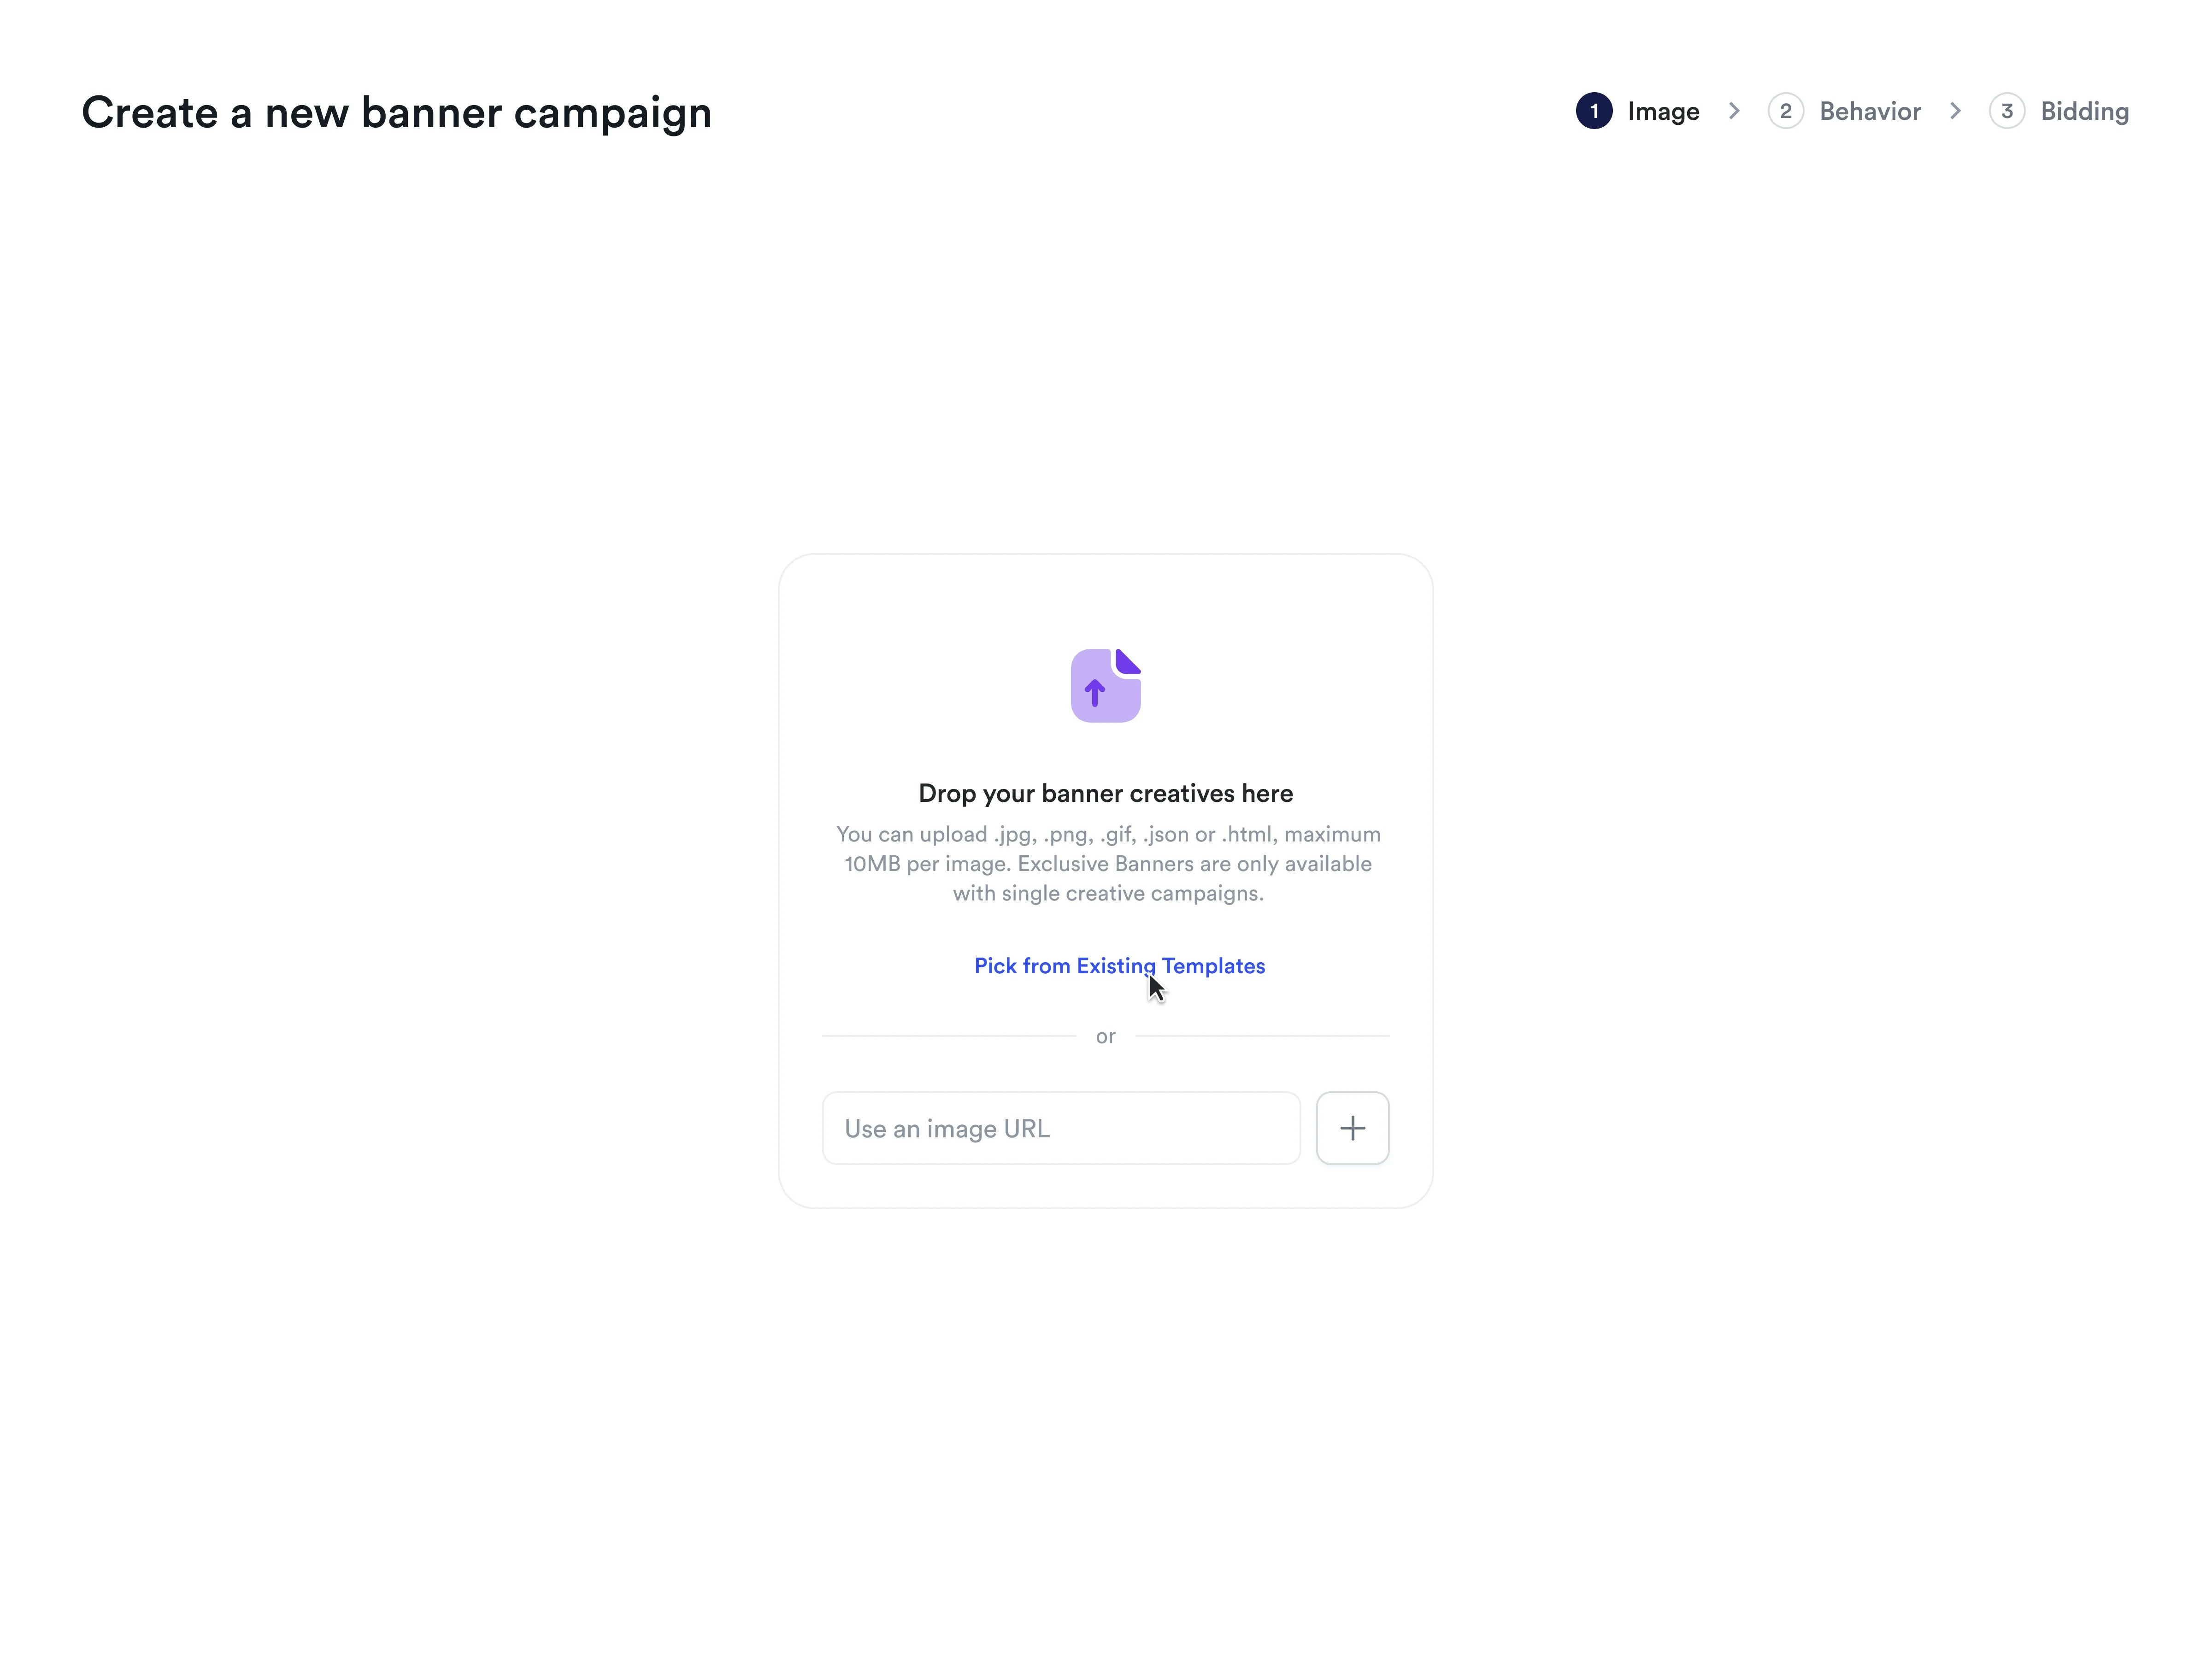
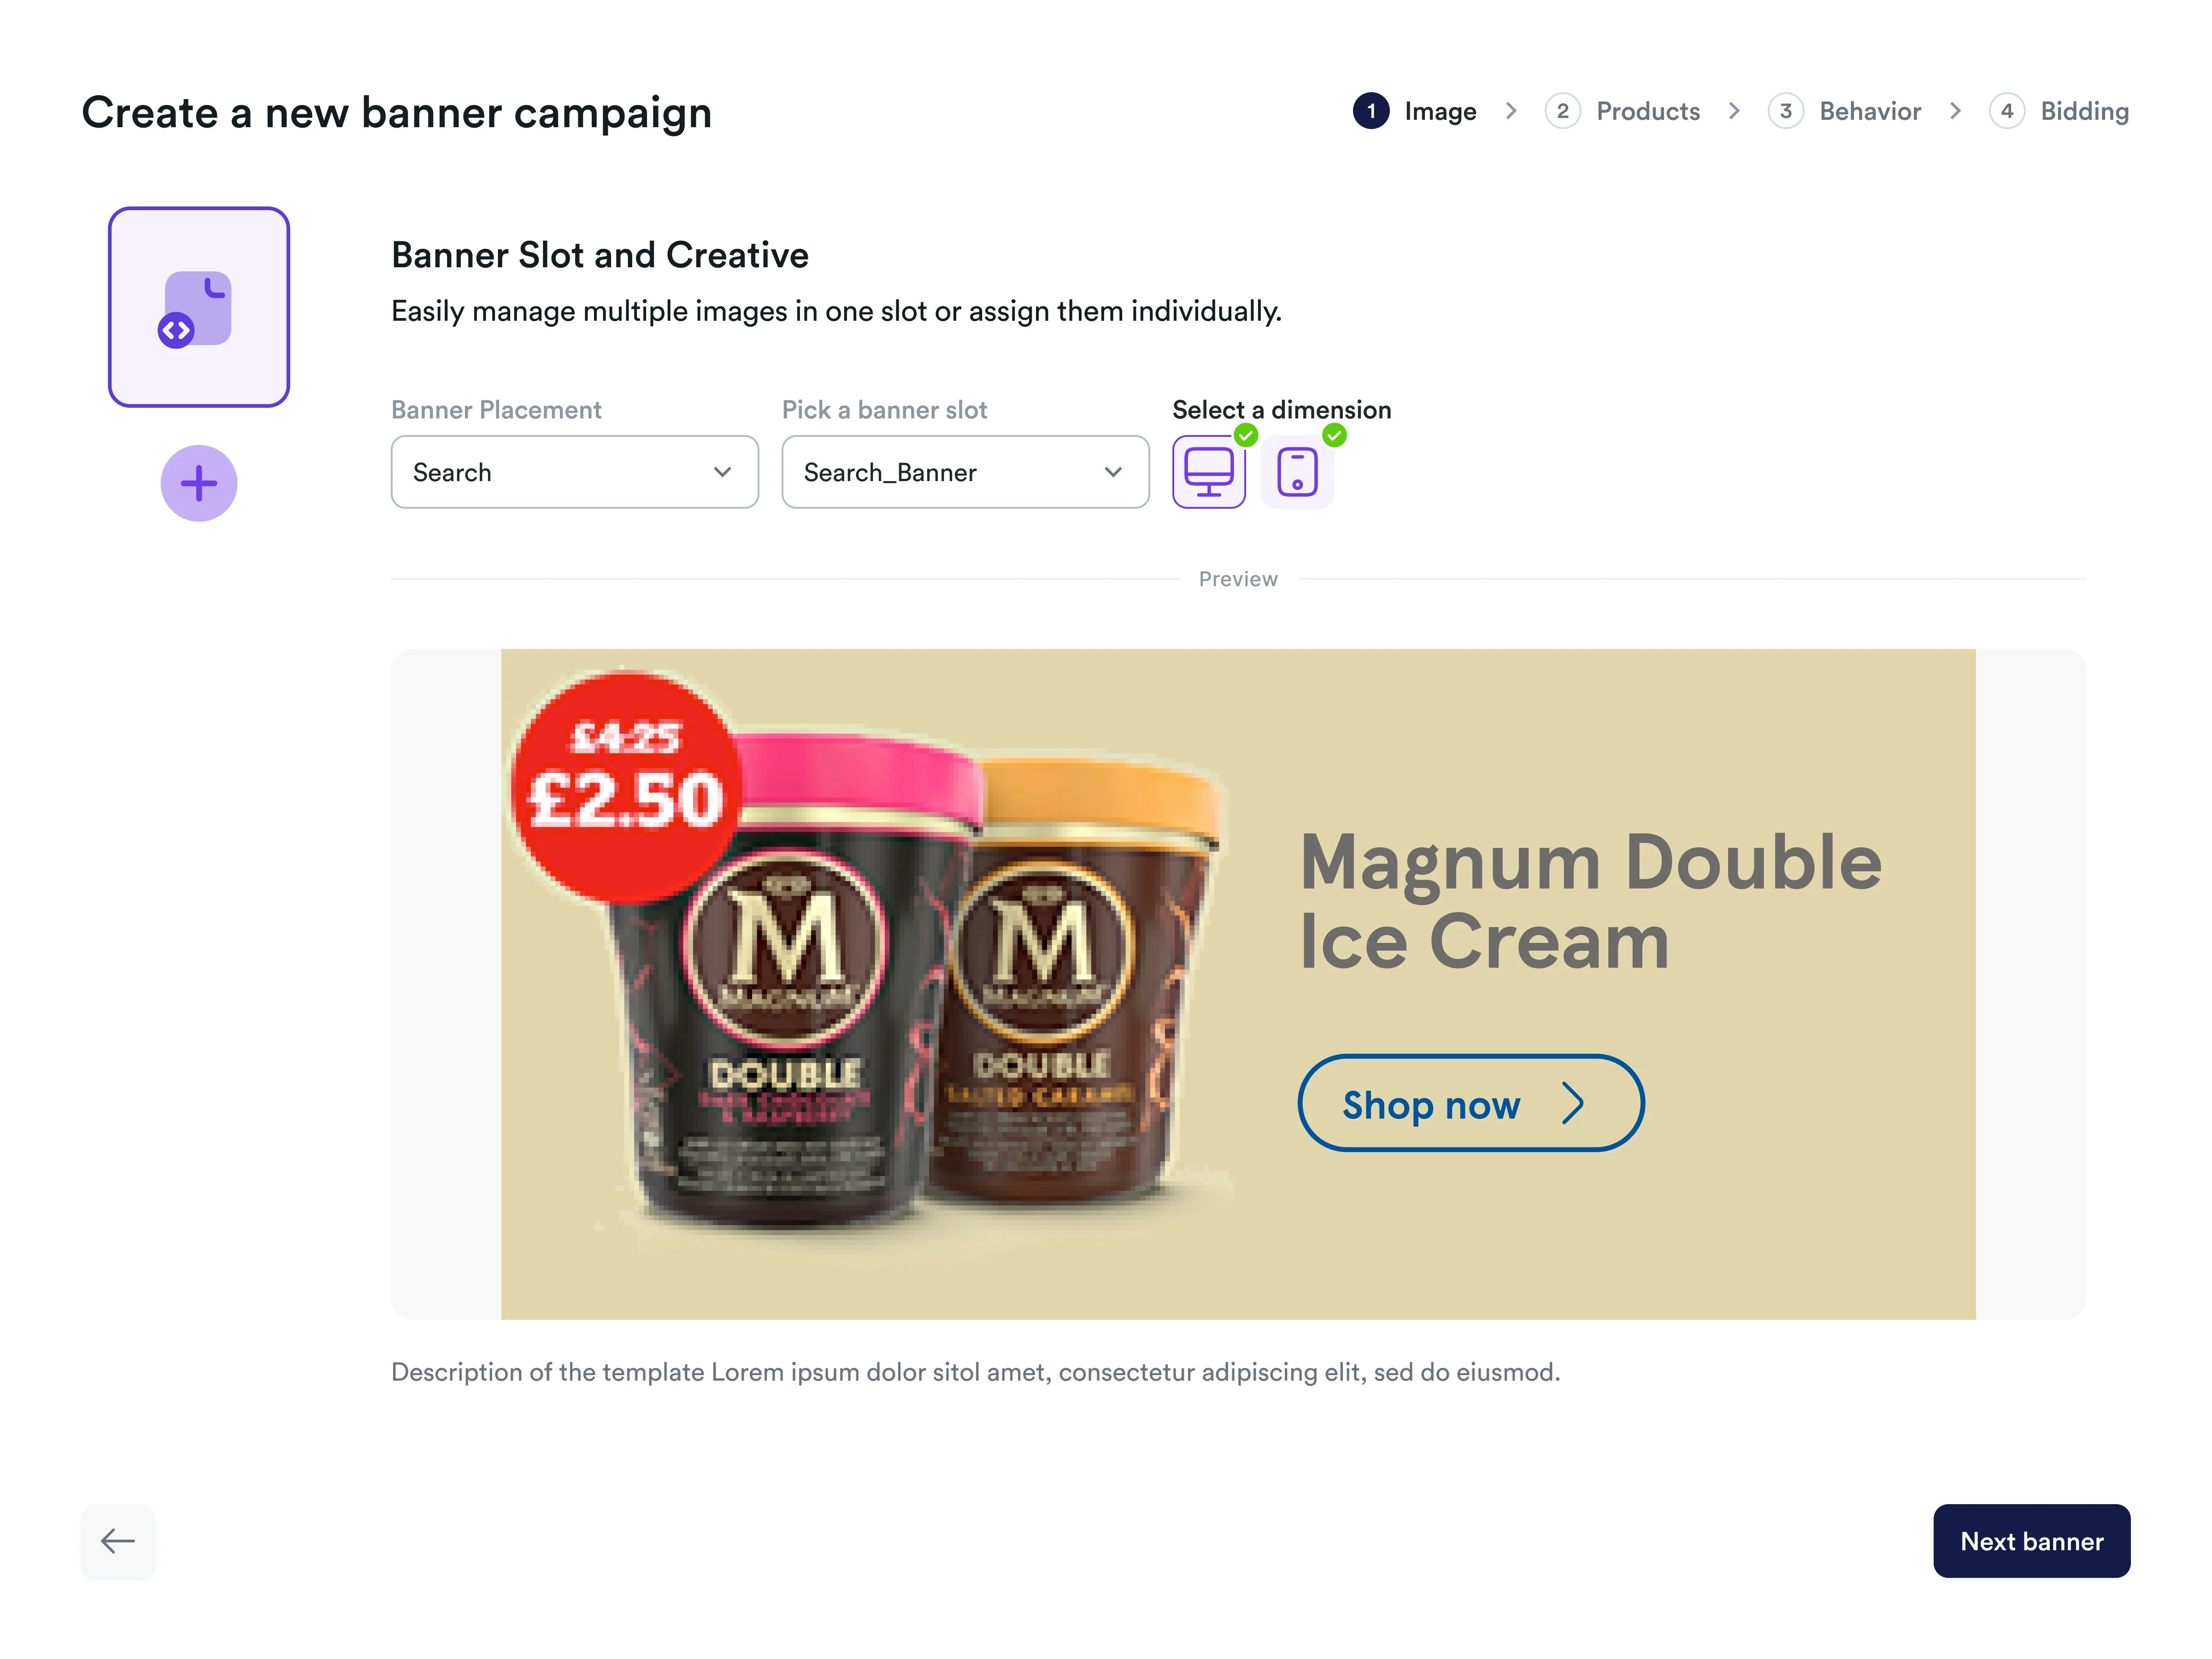
Provide your banner creative by either uploading a file (image, video, HTML, JSON) directly via drag-and-drop or by selecting a predefined banner template. Once the creative is ready, choose the banner slot for placement and adjust its appearance for different devices.
AI-Powered Image Resizing
When you upload images, Topsort's advanced AI automatically resizes them to
fit your selected slot dimensions perfectly. This intelligent technology
preserves your brand elements while extending backgrounds and adapting
composition as needed.
[Learn more about AI image resizing technology →](/en/knowledge-base/ad-platform/banners/ai-image-resizing/)
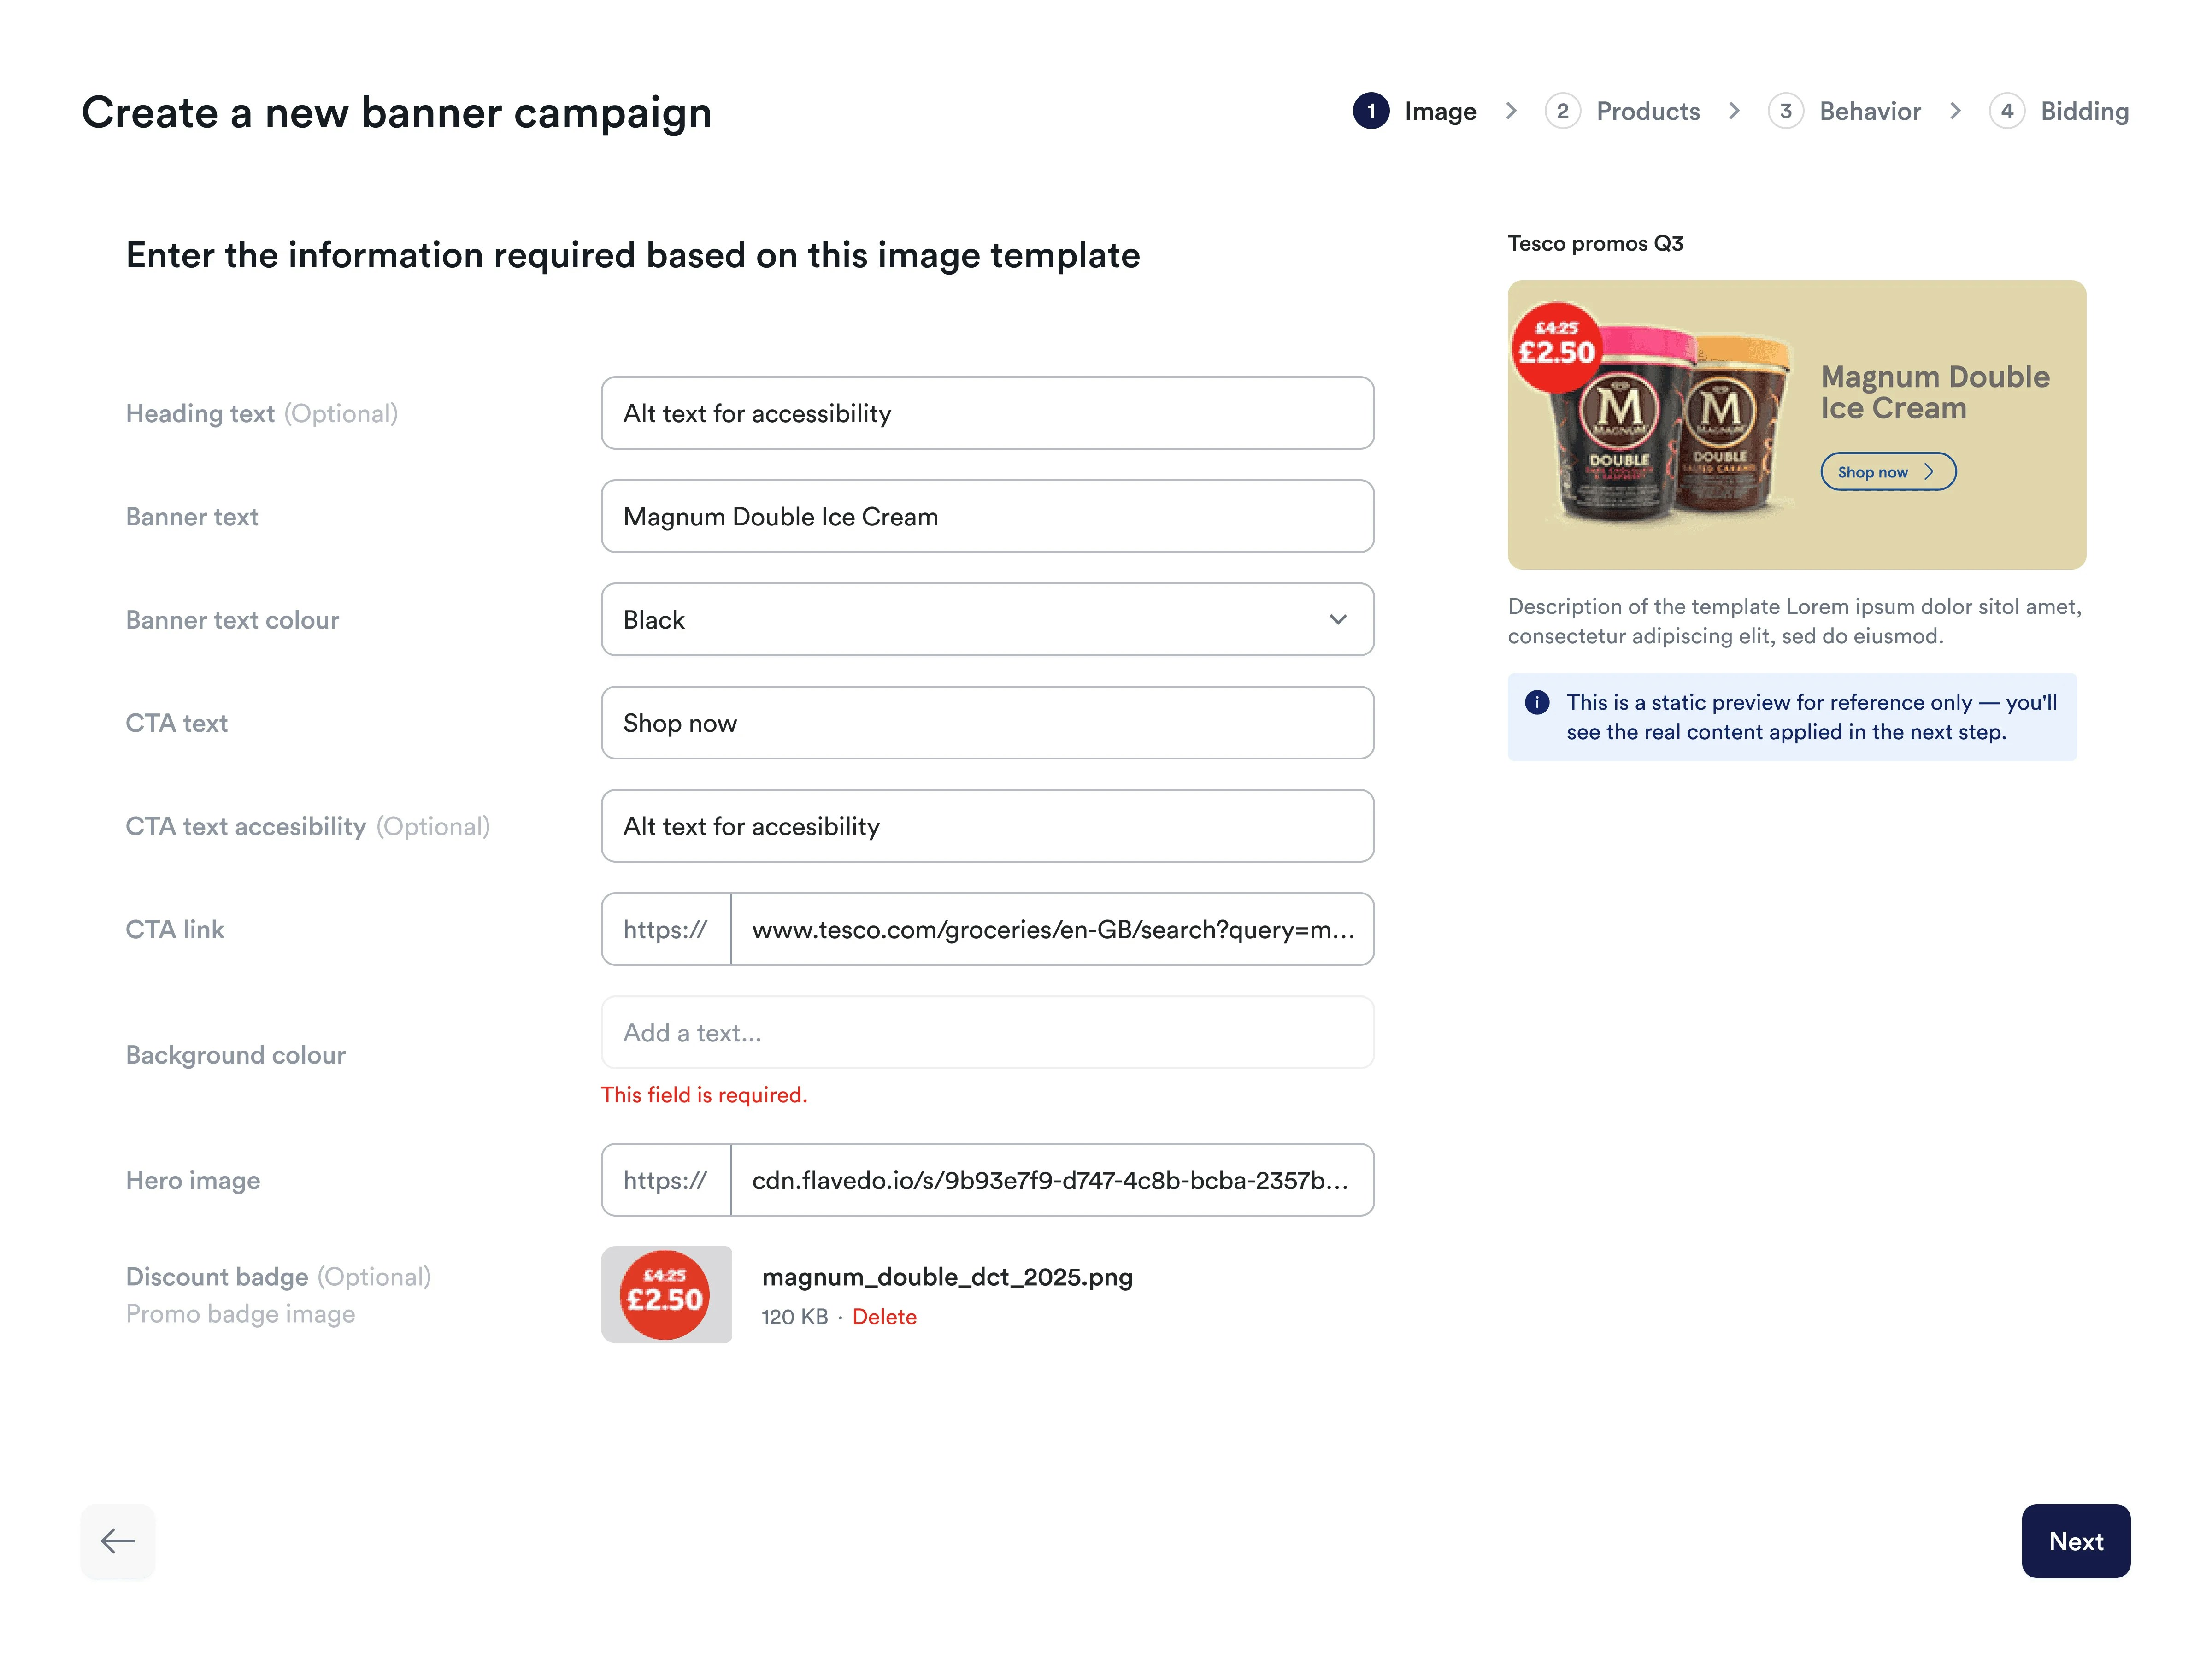
 Select up to 200 products to associate with your banner campaign. You can choose products manually or upload them via CSV. Linked products enable automatic targeting generation and improved attribution tracking.
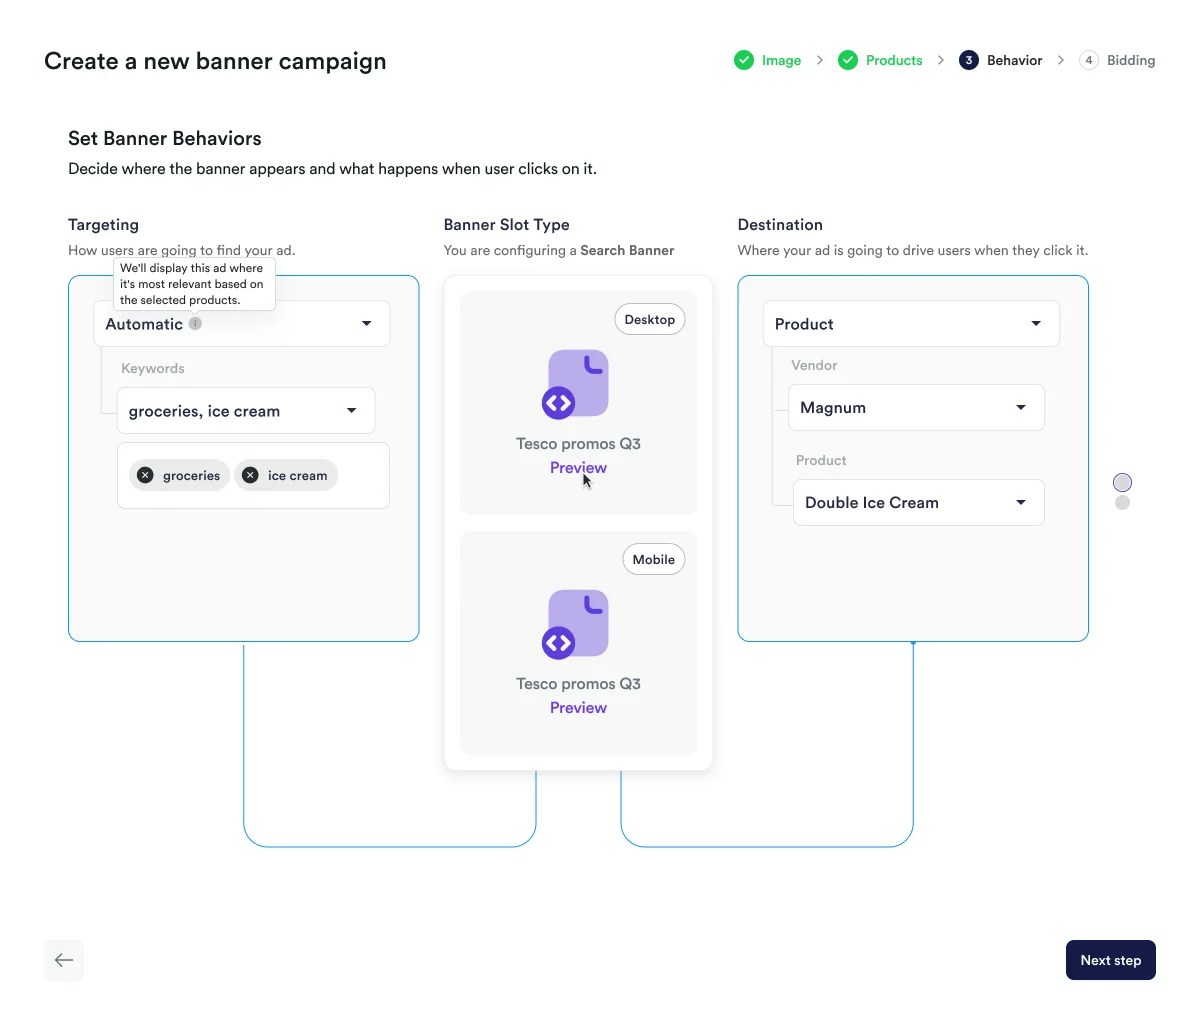
 Select categories or keywords to target. When products are linked, the system automatically generates **"Automatic" targeting** based on product data. For category or search slots, product IDs and keywords become campaign triggers, while for landing page slots, products are used for attribution only. You can supplement this with additional manual targeting.
Set the destination when the banner is clicked (product page, vendor page, or URL).
Select categories or keywords to target. When products are linked, the system automatically generates **"Automatic" targeting** based on product data. For category or search slots, product IDs and keywords become campaign triggers, while for landing page slots, products are used for attribution only. You can supplement this with additional manual targeting.
Set the destination when the banner is clicked (product page, vendor page, or URL).
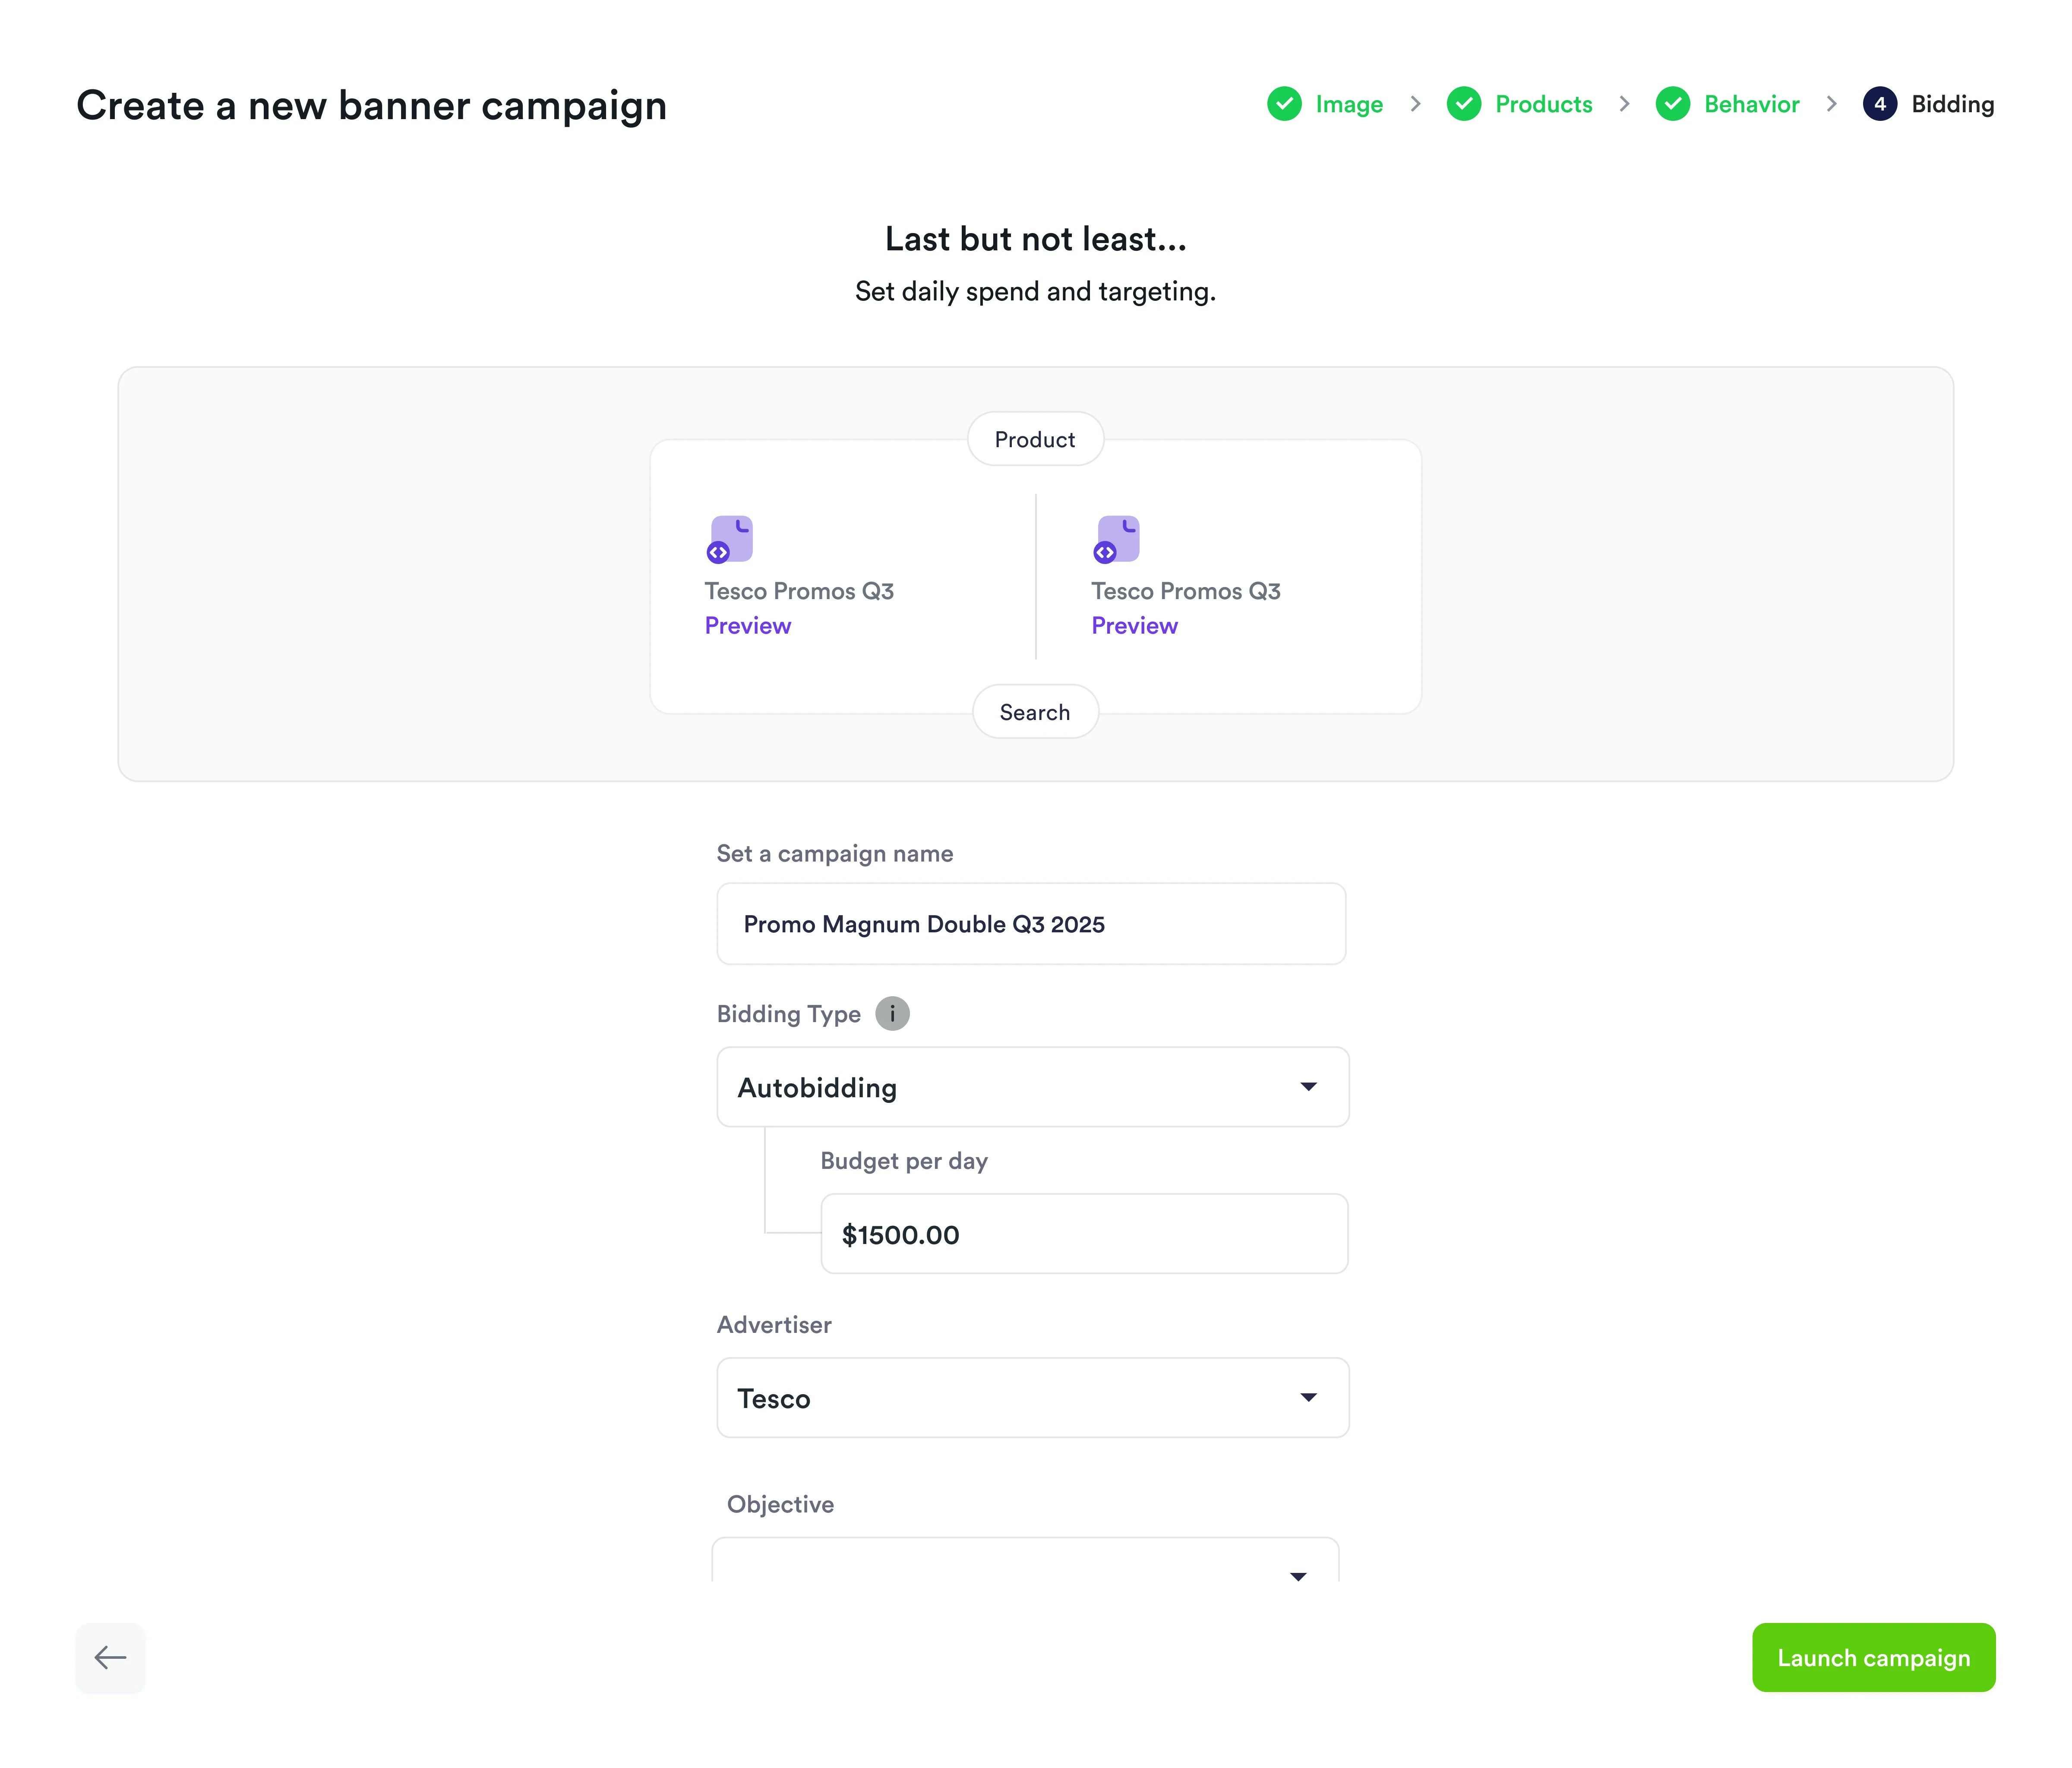
 Finalize your setup by giving the campaign a name, choosing a bidding strategy (e.g., Autobidding) or an exclusive placement, and setting its duration. Once you're ready, click "Launch" to activate your campaign!
 ## After You Launch
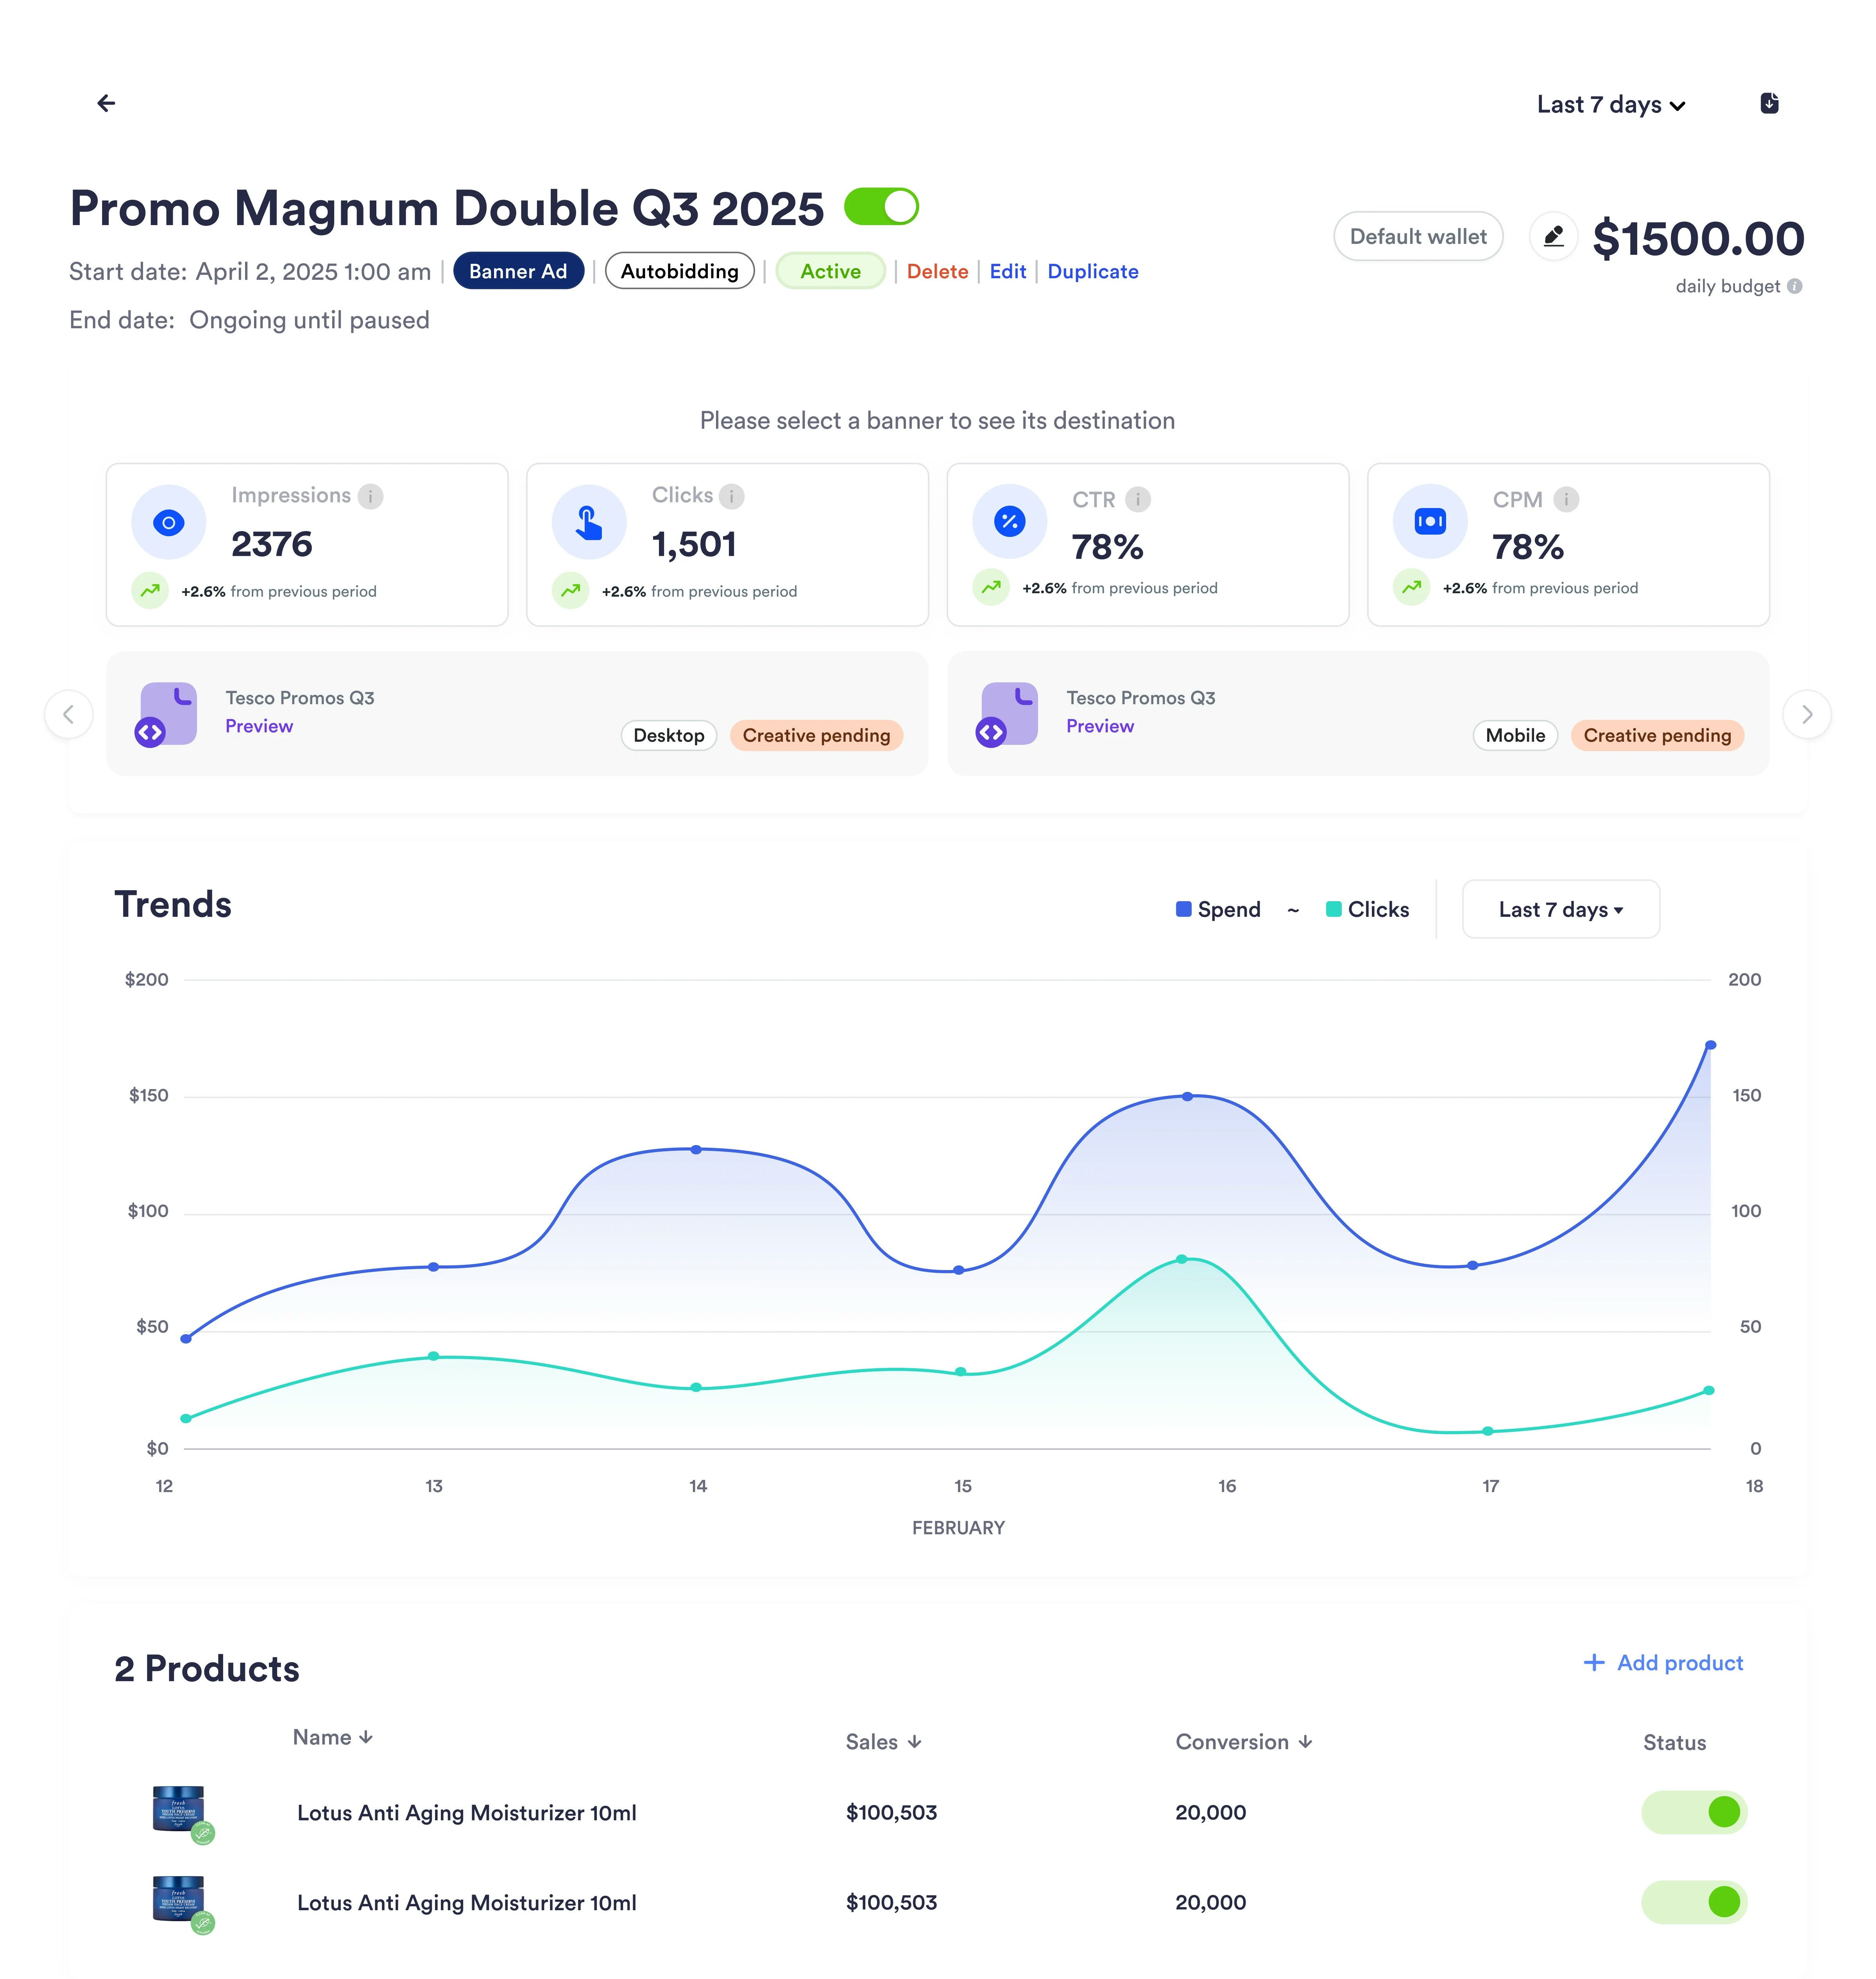
Once your campaign is live, you can monitor its performance from the campaign
view. Track key metrics and analyze both overall campaign effectiveness and
individual product performance to optimize your strategy.
 ## Attribution and Reporting
### Direct Attribution
All linked products are considered for direct attribution when purchases are reported, eliminating the need for additional attribution logic.
### Campaign Reporting
Enhanced reporting includes:
* Campaign-level metrics (impressions, clicks, ad spend, ROAS)
* Product-level performance data (sales and conversions per product)
* Historical product performance tracking even after product lists are edited
### Interaction Tracking
* **Impressions**: Tracked using the campaign's resolvedBidId
* **Clicks**: Tracked when users click banner ads, with all products eligible for attribution
* **Halo Attribution**: Last-click on creative considered for broader attribution analysis
Refer to the [Running Auctions](/en/knowledge-base/ad-server/auctions/) section to learn more about how to get winners for banner ads.
***
## Attribution and Reporting
### Direct Attribution
All linked products are considered for direct attribution when purchases are reported, eliminating the need for additional attribution logic.
### Campaign Reporting
Enhanced reporting includes:
* Campaign-level metrics (impressions, clicks, ad spend, ROAS)
* Product-level performance data (sales and conversions per product)
* Historical product performance tracking even after product lists are edited
### Interaction Tracking
* **Impressions**: Tracked using the campaign's resolvedBidId
* **Clicks**: Tracked when users click banner ads, with all products eligible for attribution
* **Halo Attribution**: Last-click on creative considered for broader attribution analysis
Refer to the [Running Auctions](/en/knowledge-base/ad-server/auctions/) section to learn more about how to get winners for banner ads.
***