> ## Documentation Index
> Fetch the complete documentation index at: https://docs.topsort.com/llms.txt
> Use this file to discover all available pages before exploring further.

# Native Ads Banner Templating

export const LastUpdated = ({date, lang = "en"}) => {
  const translations = {
    en: "Last updated:",
    es: "Última actualización:",
    pt: "Última atualização:",
    fr: "Dernière mise à jour:",
    de: "Zuletzt aktualisiert:"
  };
  const label = translations[lang] || translations.en;
  return <>
<style>{`
.last-updated-component {
display: inline-flex;
align-items: center;
gap: 8px;
padding: 10px 16px;
border-radius: 8px;
margin-top: 12px;
margin-bottom: 16px;
font-size: 14px;
background-color: rgba(0, 0, 0, 0.05);
border: 1px solid rgba(0, 0, 0, 0.12);
color: rgba(0, 0, 0, 0.75);
line-height: 1;
}

        .last-updated-component svg {
          flex-shrink: 0;
          vertical-align: middle;
        }

        .last-updated-component span {
          display: inline-flex !important;
          align-items: center !important;
          line-height: 1 !important;
        }

        [data-theme="dark"] .last-updated-component {
          background-color: #3a3a3a;
          border: 2px solid #888888;
          color: #ffffff;
        }

        [data-theme="dark"] .last-updated-component svg {
          stroke: #ffffff;
        }
      `}</style>
      <div className="last-updated-component">
        <svg width="16" height="16" viewBox="0 0 24 24" fill="none" stroke="currentColor" strokeWidth="2" strokeLinecap="round" strokeLinejoin="round">
          <circle cx="12" cy="12" r="10" />
          <polyline points="12 6 12 12 16 14" />
        </svg>
        <span>
          <strong style={{
    fontWeight: 600
  }}>{label}</strong> 
          <time dateTime={date}>{date}</time>
        </span>
      </div>
    </>;
};

<div style={{ textAlign: "justify", marginBottom: "1.5rem" }}>
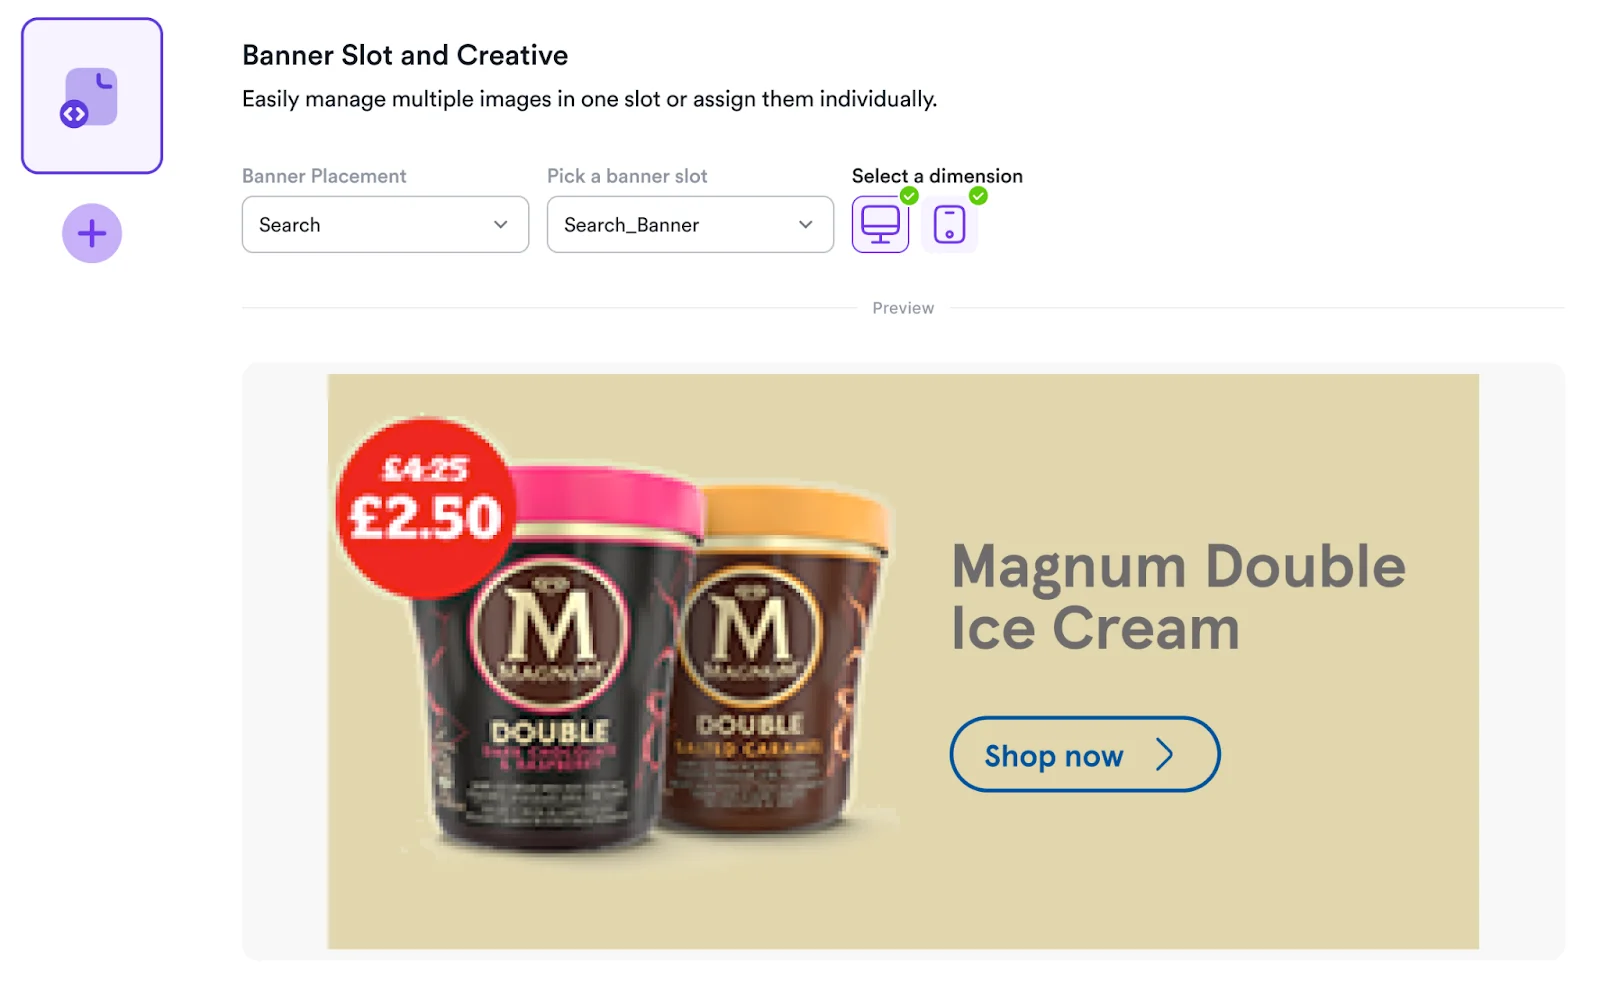
  Marketplaces use native ads that consist not just of images, but also multiple
  text fields, background images, foreground images, and other customizable
  elements. These elements can vary across different placements, making it
  challenging to maintain consistency and streamline ad creation across
  campaigns.
</div>

<div style={{ textAlign: "justify", marginBottom: "1.5rem" }}>
  Creative templates provide a solution by offering pre-designed banners that
  enable teams to quickly build ads following a structured, repeatable
  framework. These templates are highly customizable and can include specific
  fields. Whether you need fields for a button, images, headlines, custom
  parameters, or other design elements, templates allow you to standardize and
  simplify the process.
</div>

<Frame>
  <img src="https://mintcdn.com/topsort/uSrfRB5jaD2RxnFe/images/knowledge-base/golden-circle-banner-example.webp?fit=max&auto=format&n=uSrfRB5jaD2RxnFe&q=85&s=1d3d59d88333ff076d8fa1b816580690" alt="example of a banner ad." width="2092" height="300" data-path="images/knowledge-base/golden-circle-banner-example.webp" />
</Frame>

<Warning>
  **Template Management Limitation**: Currently, templates cannot be edited or
  deleted once created. Plan your template structure carefully before creation
  to ensure it meets your long-term campaign needs.
</Warning>

## How It Works

### Creating a New Template

<div style={{ textAlign: "justify", marginBottom: "1.5rem" }}>
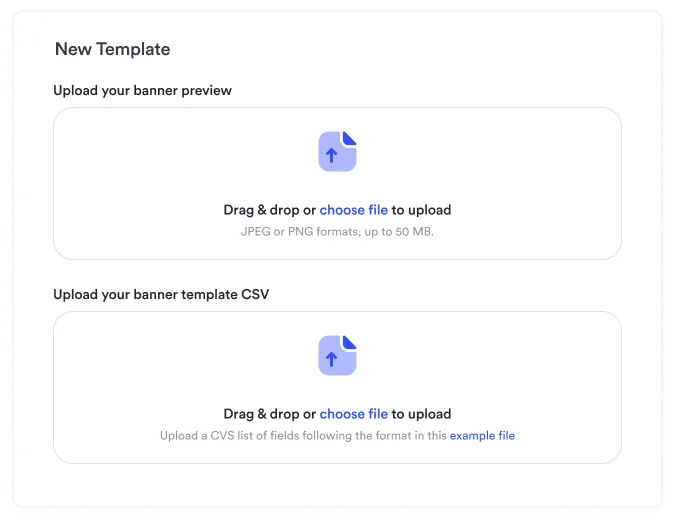
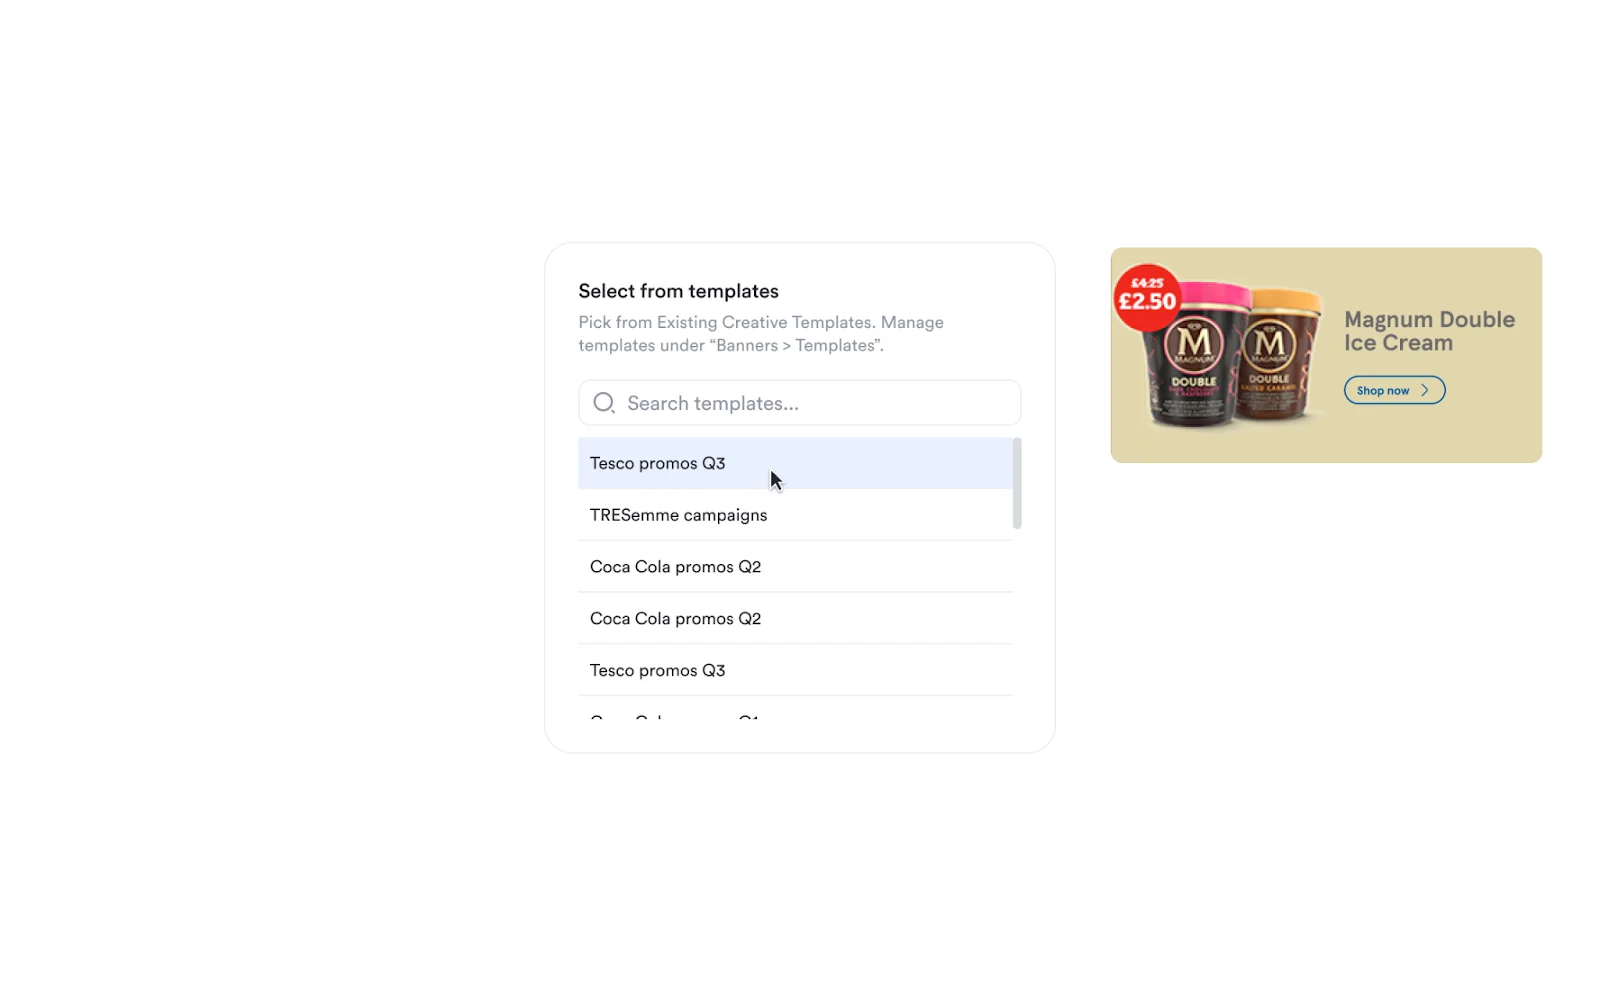
  Retailers can create custom templates tailored to their needs. These templates
  can be configured with various fields, such as text, images, external links,
  and other elements, to meet the specific requirements of the placement. Here's
  how you can create and configure a new template:
</div>

<Steps>
  <Step title="When creating a template, first define the static preview image and the fields that will make up the template. For each field, you'll need to specify:">
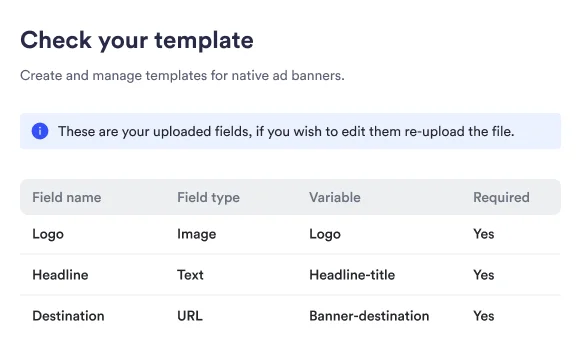
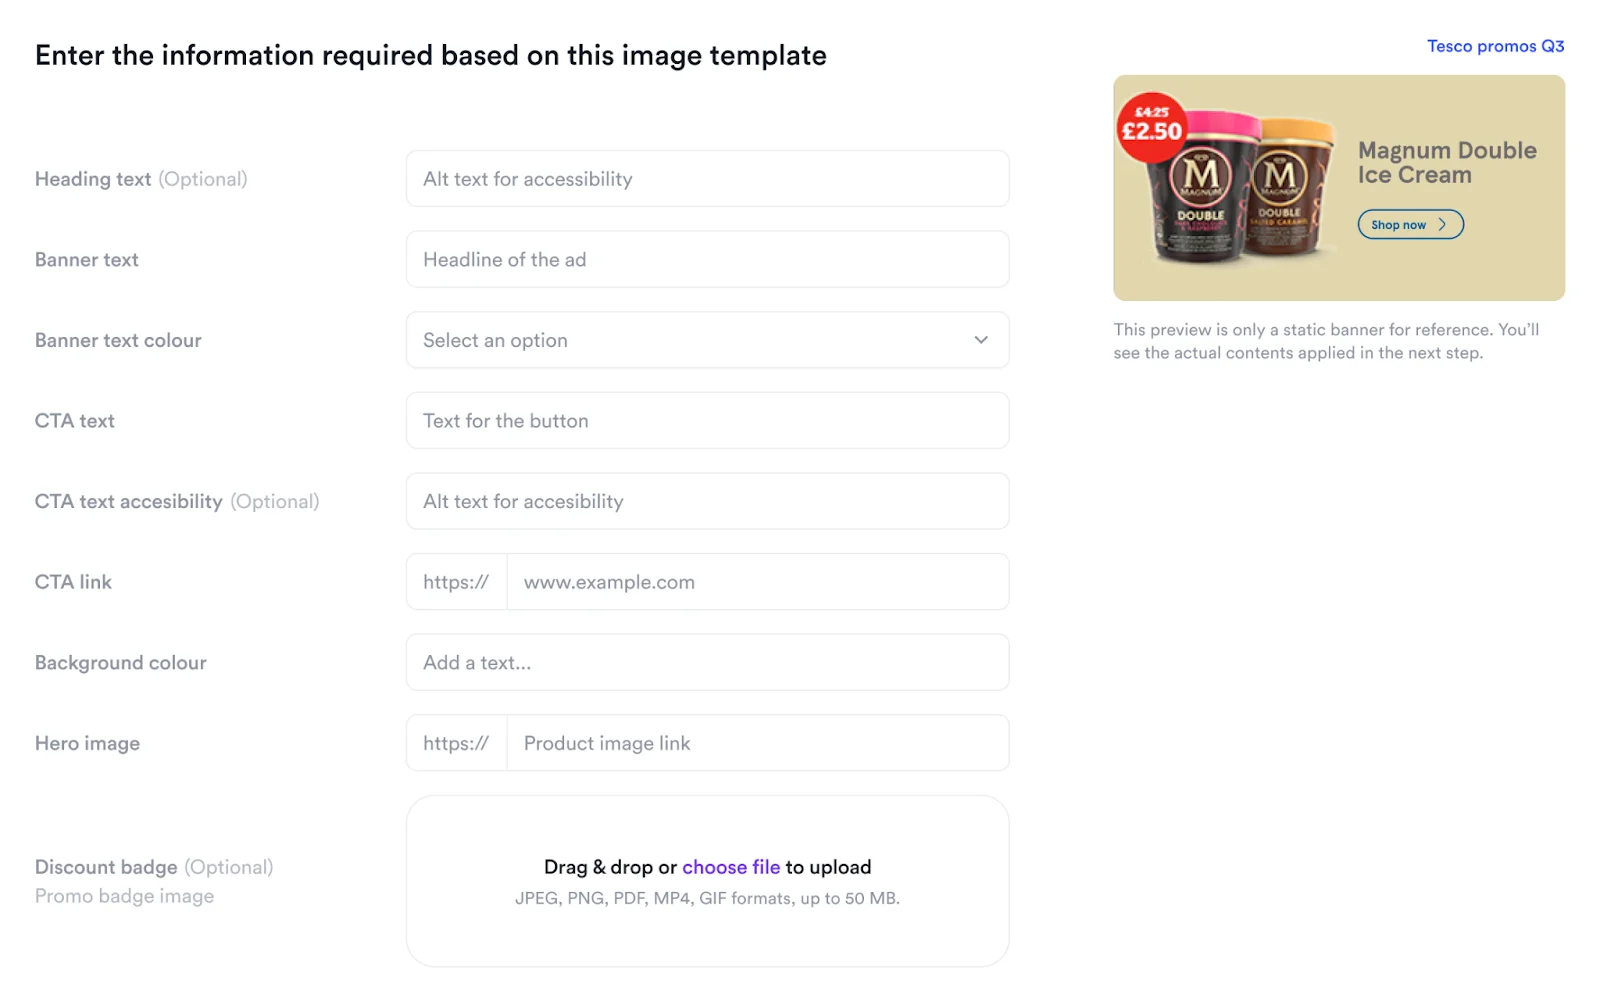
    * **Field Type**: Choose from text, image, select, button, link, etc.
    * **Variable**: The variable name that the field is going to use.
    * **Field Name**: Define a clear label for the field to identify it in the campaign creation process.
    * **Description**: Provide an explanation or instructions about what should be entered into the field.
    * **Required or Optional**: Decide if the field is mandatory for advertisers to complete, or if it can be left blank.
    * **MinLength**: min number of chars for text fields
    * **MaxLength**: max number of chars for text fields
    * **Default**: default value for the field
    * **Prefix**: for fields of type link, they will start with the prefix
    * **MultiSelect**: for fields of type select if the user should select one or multiple
    * **Options (querystring)**: keys and values for fields of type select

    <div style={{ textAlign: "justify", marginBottom: "1.5rem" }}>
      This can be done using a CSV or the UI
    </div>

    <div style={{ textAlign: "justify", marginBottom: "1.5rem" }}>
      <Frame>
        <img src="https://mintcdn.com/topsort/6z2OGMIoIAfrcYlw/images/knowledge-base/native-ads-banner-template-new-template-2.webp?fit=max&auto=format&n=6z2OGMIoIAfrcYlw&q=85&s=7bb9bc70c61ad05e06025e2788d67fd5" alt="Screenshot of creating new template" width="675" height="522" data-path="images/knowledge-base/native-ads-banner-template-new-template-2.webp" />
      </Frame>
    </div>

    <div style={{ textAlign: "justify", marginBottom: "1.5rem" }}>
      <Frame>
        <img src="https://mintcdn.com/topsort/6z2OGMIoIAfrcYlw/images/knowledge-base/native-ads-banner-template-check-template.webp?fit=max&auto=format&n=6z2OGMIoIAfrcYlw&q=85&s=1c7aa3399d9772e8703118dde653a9c8" alt="Screenshot of reviewing new template" width="581" height="351" data-path="images/knowledge-base/native-ads-banner-template-check-template.webp" />
      </Frame>
    </div>
  </Step>

  <Step title="Then, give it a unique name, a brief description to help advertisers understand its intended purpose, and optionally add a dynamic preview URL.">
    <div style={{textAlign: 'justify', marginBottom: '1.5rem'}}>
      **<Frame>      <img src="https://mintcdn.com/topsort/6z2OGMIoIAfrcYlw/images/knowledge-base/native-ads-name-and-preview.webp?fit=max&auto=format&n=6z2OGMIoIAfrcYlw&q=85&s=0d0b995cfde598b58c4b831d81539e99" alt="Screenshot of reviewing new template" width="656" height="806" data-path="images/knowledge-base/native-ads-name-and-preview.webp" /></Frame>**
    </div>
  </Step>
</Steps>

### Dynamic Preview Configuration

<Tip>
  **Dynamic Preview Availability**: Dynamic preview functionality is only
  available for templates that specifically enable this feature during creation.
</Tip>

<div style={{ textAlign: "justify", marginBottom: "1.5rem" }}>
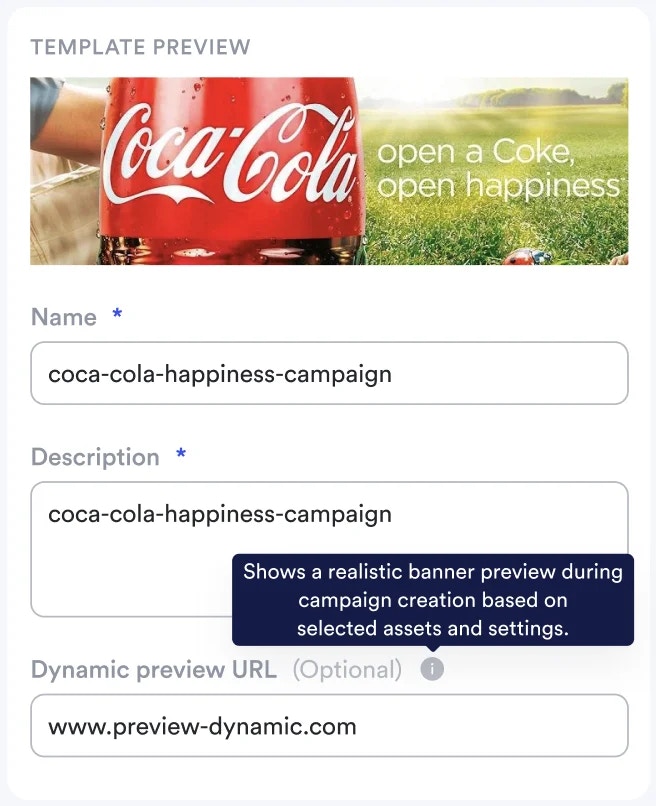
  Dynamic preview URLs allow real-time visualization of how template fields will
  appear in the actual ad placement. The preview system loads your specified URL
  in an iframe and dynamically populates template variables with campaign data.
</div>

<Steps>
  <Step title="Prepare Your Preview Environment">
    Before configuring dynamic preview in the template, ensure you have a preview URL available that can render the template structure. This could be on your local development environment or a deployed staging application.
  </Step>

  <Step title="Configure Preview URL Pattern">
    <div style={{textAlign: 'justify', marginBottom: '1.5rem'}}>
      Set up your dynamic preview URL using template variable placeholders. The URL structure should include parameters that correspond to your template fields:
    </div>

    ```
    https://your-preview-domain.com/?slotId=slot-1&headline={headline}&mainImage={urlEncodedImageURL}&price={price}&availability={availability}
    ```
  </Step>

  <Step title="Template Variable Integration">
    <div style={{textAlign: 'justify', marginBottom: '1.5rem'}}>
      The preview system will automatically replace template variables in the URL with actual values as advertisers fill out campaign fields, enabling real-time preview updates.
    </div>
  </Step>

  <Step title="Client-Side Rendering">
    <div style={{textAlign: 'justify', marginBottom: '1.5rem'}}>
      Your preview URL should include the necessary client-side logic to locate and populate template elements with the provided parameters.
    </div>
  </Step>
</Steps>

<Note>
  **Preview URL Requirements**: Your preview URL must be accessible and include
  the necessary rendering logic to display template content correctly. The
  system uses client-side JavaScript to override content within designated
  template elements.
</Note>

### Using Templates

<Steps>
  <Step title="Choose to start from template">
    <Frame>
      <img src="https://mintcdn.com/topsort/JfdWUceY7Se3NW-0/images/knowledge-base/banner-pick-existing-template.webp?fit=max&auto=format&n=JfdWUceY7Se3NW-0&q=85&s=634701b9f4c22dcf3d9b10a4b1d7346a" alt="Screenshot of picking an existing template" width="712" height="712" data-path="images/knowledge-base/banner-pick-existing-template.webp" />
    </Frame>
  </Step>

  <Step title="Select a template from the list">
    <Frame>
      <img src="https://mintcdn.com/topsort/uSrfRB5jaD2RxnFe/images/knowledge-base/banner-select-existing-template.webp?fit=max&auto=format&n=uSrfRB5jaD2RxnFe&q=85&s=1141c2ba9e86232c9c3e15496e051a2f" alt="Screenshot of selecting existing template" width="1600" height="995" data-path="images/knowledge-base/banner-select-existing-template.webp" />
    </Frame>
  </Step>

  <Step title="Fill the template fields">
    <Frame>
      <img src="https://mintcdn.com/topsort/JfdWUceY7Se3NW-0/images/knowledge-base/banner-fill-in-template.webp?fit=max&auto=format&n=JfdWUceY7Se3NW-0&q=85&s=b7cc320f26109906fdb23a20d8f4c4df" alt="Screenshot of filling in existing template" width="1600" height="1002" data-path="images/knowledge-base/banner-fill-in-template.webp" />
    </Frame>
  </Step>

  <Step title="Continue with the banner campaign creation flow">
    <Frame>
      <img src="https://mintcdn.com/topsort/6z2OGMIoIAfrcYlw/images/knowledge-base/on-to-banner-creation.webp?fit=max&auto=format&n=6z2OGMIoIAfrcYlw&q=85&s=8f89eea4c870c62dc79756825aadb6e3" alt="Screenshot of using template in campaign" width="1600" height="995" data-path="images/knowledge-base/on-to-banner-creation.webp" />
    </Frame>
  </Step>
</Steps>

## Template Response Structure

<div style={{ textAlign: "justify", marginBottom: "1.5rem" }}>
  Each winner in the auction response includes a `content` object containing the
  parameters configured during campaign creation:
</div>

```json theme={null}
{
  "results": [
    {
      "resultType": "banners",
      "winners": [
        {
          "rank": 1,
          "asset": [
            {
              "url": "https://topsortassets.com/000.json",
              "content": {
                "cta": "Shop Now",
                "mainImage": "https://topsortassets.com/0001.png",
                "headline": "Test Headline",
                "backgroundImage": "https://topsortassets.com/0002.jpeg"
              }
            }
          ],
          "type": "url",
          "id": "http://topsort.com",
          "resolvedBidId": "ChAGiHlBYmh4DaUEsuubfw7wEhABl8c_uHx3Aa8pw_EgHrHIGhABjoa6wYJ3wqhfIGHIdxYgIhYKEmh0dHA6Ly90b3Bzb3J0LmNvbRAFMOGtDw",
          "vendorId": "babolat",
          "campaignId": "0197c73f-b87c-7701-af29-c3f1201eb1c8"
        }
      ],
      "error": false
    }
  ]
}
```

<div style={{ textAlign: "justify", marginBottom: "1.5rem" }}>
  The `content` object structure directly corresponds to the template fields
  configured during template creation, enabling your frontend to dynamically
  render the appropriate creative elements for each placement.
</div>

<Note>
  **Implementation Note**: Use the template field variables as keys in your
  rendering logic to ensure consistency between campaign configuration and
  frontend display across all placements.
</Note>

***

<LastUpdated date="2025-11-18" />
