> ## Documentation Index
> Fetch the complete documentation index at: https://docs.topsort.com/llms.txt
> Use this file to discover all available pages before exploring further.
# Self-Service Payments—Stripe
export const LastUpdated = ({date, lang = "en"}) => {
const translations = {
en: "Last updated:",
es: "Última actualización:",
pt: "Última atualização:",
fr: "Dernière mise à jour:",
de: "Zuletzt aktualisiert:"
};
const label = translations[lang] || translations.en;
return <>
;
};
Topsort also offers a "Self-Service Payments" capability through Stripe. This allows vendors to manage their own payments, track spending, and view billing information, while marketplaces benefit from automated payment workflows and transparent reporting. Vendors are charged when they reach a set credit limit or at the end of a billing cycle, with Topsort integrating with Stripe for transactions.
You need a Stripe account to use this capability.
## Admin Configuration Steps
Navigate to Settings → Payments. Talk to your Topsort sales representative to enable it.
Click "Connect Now" and follow the Stripe integration process.
 After connecting Stripe, enable “Self-service” and set a credit limit for your vendors. Vendors will be charged when they reach this limit or at the end of the billing cycle.
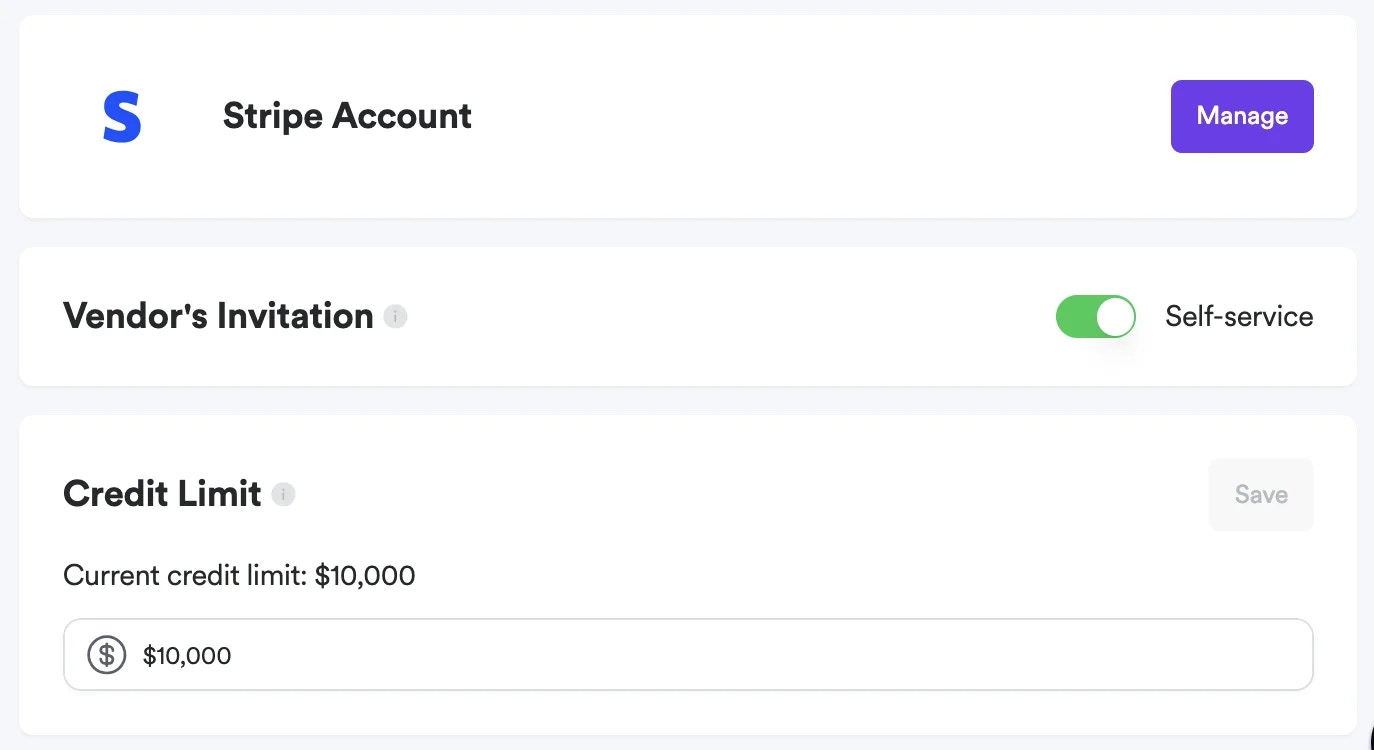 Toggle the invitation setting to "Self-Service" and invite vendors.
Only new vendors without active campaigns or a balance will become self-service; others will remain managed.
## Vendor Setup
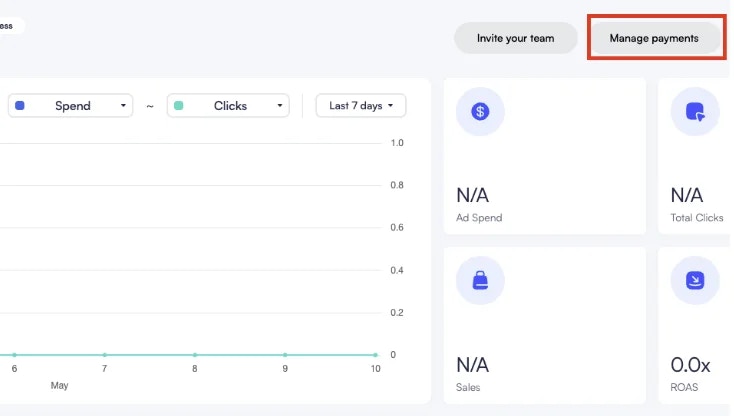
From the Vendor Dashboard, click "Manage Payments."
Toggle the invitation setting to "Self-Service" and invite vendors.
Only new vendors without active campaigns or a balance will become self-service; others will remain managed.
## Vendor Setup
From the Vendor Dashboard, click "Manage Payments."
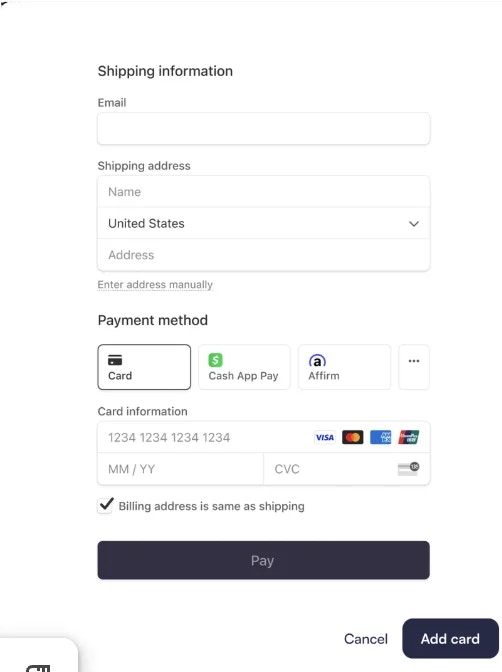
 Click "Add a card" and enter your payment details.
 You can now create campaigns. Your payment method will be charged when your credit limit is reached or at the end of the billing cycle.
## Payment Receipts and Notifications
You can now create campaigns. Your payment method will be charged when your credit limit is reached or at the end of the billing cycle.
## Payment Receipts and Notifications
Marketplace admins receive notifications whenever a charge is made to a vendor. They can check and download the receipts and their history directly from the Payments Tab.
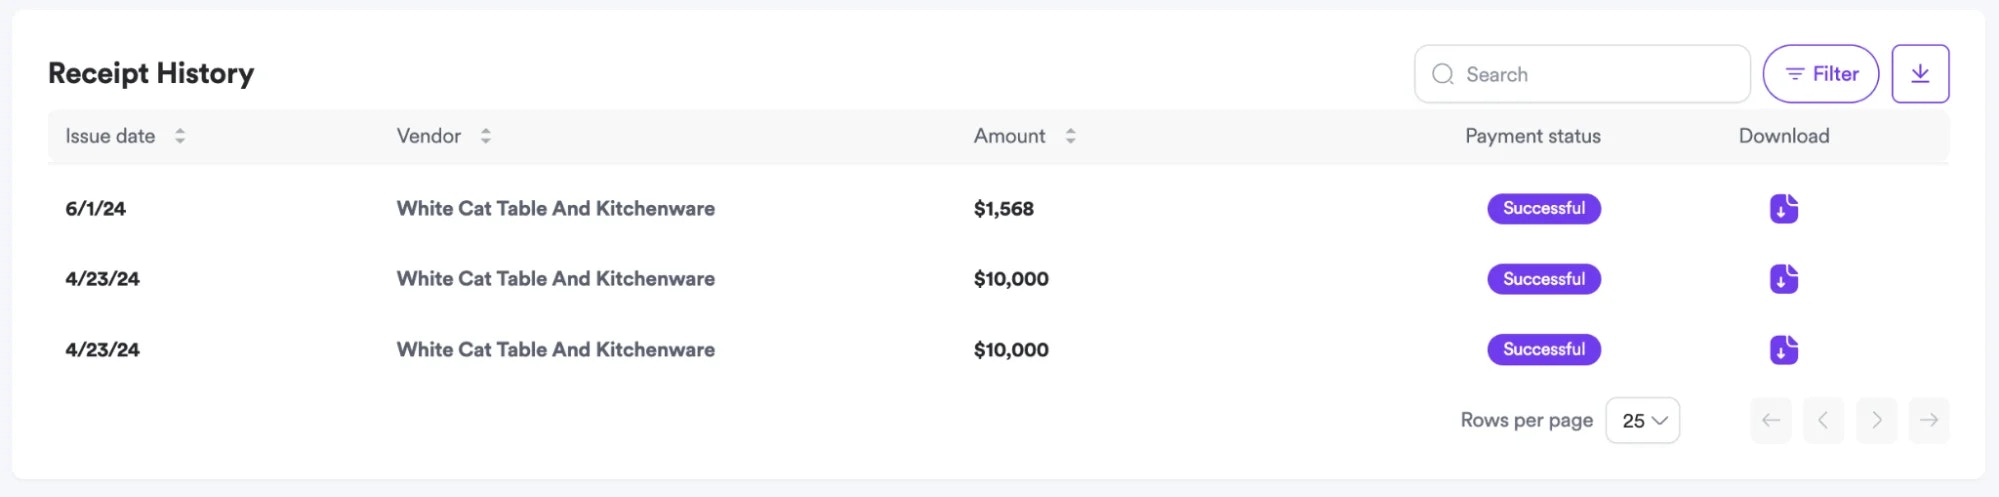 Vendors will also receive notifications whenever a charge is made. When a payment fails vendors will also be notified.
## Frequently Asked Questions
1. **When is a vendor's credit card charged?**
* A vendor's credit card is charged every time they reach their set credit limit, or by the end of the billing cycle (monthly).
2. **Will campaigns stop immediately after a vendor reaches their credit limit?**
* No, campaigns will only pause after a failed charge.
3. **When do changes to the credit limit take effect?**
* Any adjustments to the credit limit will apply starting from the next billing cycle (monthly).
***
Vendors will also receive notifications whenever a charge is made. When a payment fails vendors will also be notified.
## Frequently Asked Questions
1. **When is a vendor's credit card charged?**
* A vendor's credit card is charged every time they reach their set credit limit, or by the end of the billing cycle (monthly).
2. **Will campaigns stop immediately after a vendor reaches their credit limit?**
* No, campaigns will only pause after a failed charge.
3. **When do changes to the credit limit take effect?**
* Any adjustments to the credit limit will apply starting from the next billing cycle (monthly).
***