> ## Documentation Index
> Fetch the complete documentation index at: https://docs.topsort.com/llms.txt
> Use this file to discover all available pages before exploring further.

# Vendor Self-Service

> How vendor self-service works

export const LastUpdated = ({date, lang = "en"}) => {
  const translations = {
    en: "Last updated:",
    es: "Última actualización:",
    pt: "Última atualização:",
    fr: "Dernière mise à jour:",
    de: "Zuletzt aktualisiert:"
  };
  const label = translations[lang] || translations.en;
  return <>
<style>{`
.last-updated-component {
display: inline-flex;
align-items: center;
gap: 8px;
padding: 10px 16px;
border-radius: 8px;
margin-top: 12px;
margin-bottom: 16px;
font-size: 14px;
background-color: rgba(0, 0, 0, 0.05);
border: 1px solid rgba(0, 0, 0, 0.12);
color: rgba(0, 0, 0, 0.75);
line-height: 1;
}

        .last-updated-component svg {
          flex-shrink: 0;
          vertical-align: middle;
        }

        .last-updated-component span {
          display: inline-flex !important;
          align-items: center !important;
          line-height: 1 !important;
        }

        [data-theme="dark"] .last-updated-component {
          background-color: #3a3a3a;
          border: 2px solid #888888;
          color: #ffffff;
        }

        [data-theme="dark"] .last-updated-component svg {
          stroke: #ffffff;
        }
      `}</style>
      <div className="last-updated-component">
        <svg width="16" height="16" viewBox="0 0 24 24" fill="none" stroke="currentColor" strokeWidth="2" strokeLinecap="round" strokeLinejoin="round">
          <circle cx="12" cy="12" r="10" />
          <polyline points="12 6 12 12 16 14" />
        </svg>
        <span>
          <strong style={{
    fontWeight: 600
  }}>{label}</strong> 
          <time dateTime={date}>{date}</time>
        </span>
      </div>
    </>;
};

## Enabling Self-Service

<div style={{textAlign: 'justify', marginBottom: '1.5rem'}}>
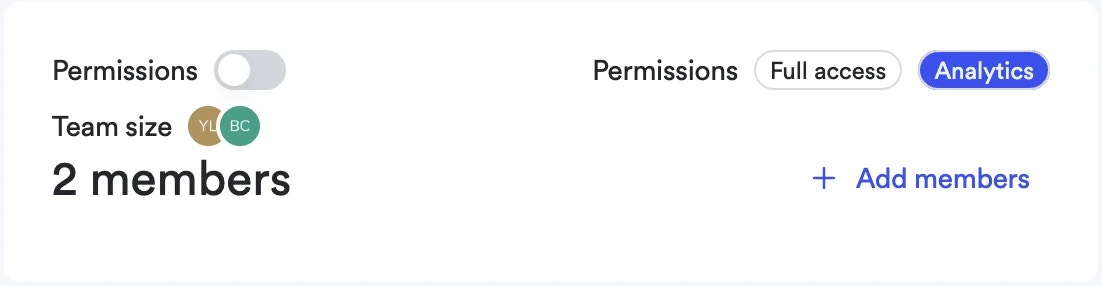
  To enable self-service, marketplace admins or sales users can manage vendor users directly from the Admin Dashboard. Each vendor user is assigned a role that determines their level of access within the vendor dashboard.
</div>

<div style={{textAlign: 'justify', marginBottom: '1.5rem'}}>
  Two roles are available for vendor users:
</div>

<div style={{textAlign: 'justify', marginBottom: '1.5rem'}}>
  1. **Admin** — Full access to the vendor dashboard: manage campaigns, set budgets, invite other vendor users, and view analytics.
  2. **Analytics** — Read-only access to the vendor dashboard: view campaign performance, reports, and dashboards without the ability to make changes.
</div>

<Note>Some banner ad creatives may still require marketplace approval.</Note>

<Frame>
  <img src="https://mintcdn.com/topsort/JfdWUceY7Se3NW-0/images/knowledge-base/ad-platform-self-service-and-access-vendor-self-service.webp?fit=max&auto=format&n=JfdWUceY7Se3NW-0&q=85&s=562d74a2d6229ef31937cc7467e39582" alt="Screenshot of vendor self service functionality." width="1102" height="286" data-path="images/knowledge-base/ad-platform-self-service-and-access-vendor-self-service.webp" />
</Frame>

## Managing Vendor Users

<div style={{textAlign: 'justify', marginBottom: '1.5rem'}}>
  Marketplace admins and sales users can manage the full lifecycle of vendor users from the Admin Dashboard:
</div>

* **Invite users:** Add new users to a vendor's team and assign the appropriate role (Admin or Analytics).
* **Assign roles:** Choose the role that matches the vendor user's responsibilities.
* **Deactivate users:** Revoke a vendor user's access immediately when they no longer need it. Deactivated users lose access instantly.

## Vendor Dashboard Features

<div style={{textAlign: 'justify', marginBottom: '1.5rem'}}>
  The vendor dashboard offers a centralized view for campaign management and analytics:
</div>

* **Performance monitoring:** Access real-time data and metrics about the performance of campaigns.
* **Campaign Management:** Create and review campaigns directly from the dashboard.
* **Team and Payments:** Invite team members and manage payment settings (when self-service payment is available through Stripe).
* **Support:** Access the help center and frequently asked questions.

***

<LastUpdated date="2026-03-02" />